Home / All Posts / Home Renovation Mistakes & When DIY Doesn’t Save You Money

Here are some of the renovation mistakes I’ve learned to watch out for, and how they can end up costing you more time and money.

Doing it yourself is a great way to save money on a home renovation. But a bad measurement, skipping an important step, or buying the wrong material can turn a project that was supposed to save money into one that costs more than it should. Most of the time, the mistake isn’t that you tried to DIY. It’s that you rushed the planning, didn’t measure carefully, or didn’t think through the project before getting started.
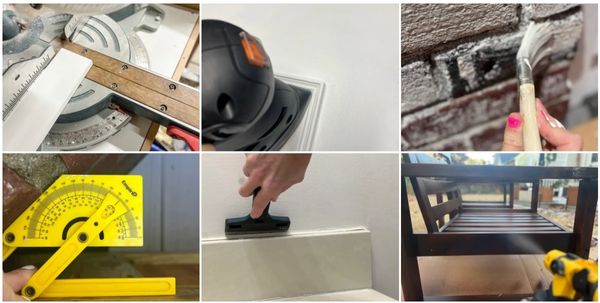
Six-photo collage illustrating common DIY mistakes: a miter saw cutting wood at an angle, a black oscillating multi-tool in use, a hand chiseling mortar from a brick wall, a yellow angle finder measuring tool, a grout float smoothing tile grout, and a dark shelving unit being assembled with a power drill.

Disclaimer: This page may contain affiliate links. If you click on one of these links and make a purchase, I may receive a small commission at no extra cost to you. I only recommend products and services that I believe will add value to my readers. See our full Affiliate Disclosure at this link.


1. Starting Without a Plan

One of the easiest renovation mistakes to make is starting before you actually know what you’re doing. An hour of planning is much easier than undoing an entire afternoon of work.
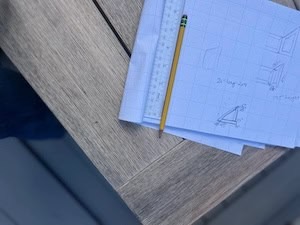
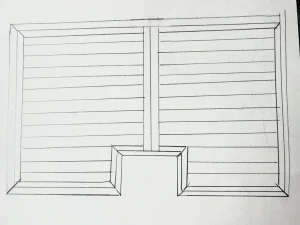
It’s tempting to grab your tools and get started, especially when you’re excited about a project. But taking a little time to figure out the steps first can save you a lot of trouble later.

Before I start a project, I try to figure out what tools and materials I need, what order everything needs to happen, how long I realistically think it will take. And then I compare that to quotes.

I also look at the instructions for any products I’m using before I buy them. There have been plenty of times when I’ve changed my plan after realizing a product wasn’t going to work the way I expected.

Outdoor shower with white enclosure
I planned on building the enclosure for our outdoor shower.
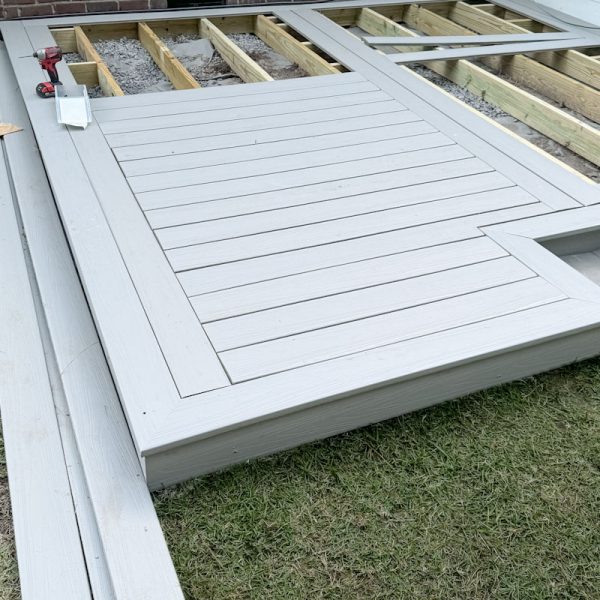
white outdoor shower enclosure on floating composite deck
But after tons of research it was lot cheaper and easier to just buy this Zippity Outdoor Enclosure

2. Measuring Once

You’ve probably heard the old saying: measure twice, cut once. Incorrect measurements can cause all kinds of problems, from wasted materials to things that simply don’t fit.

This is especially important for projects involving tile, wallpaper, trim, shelving, curtains, and furniture.

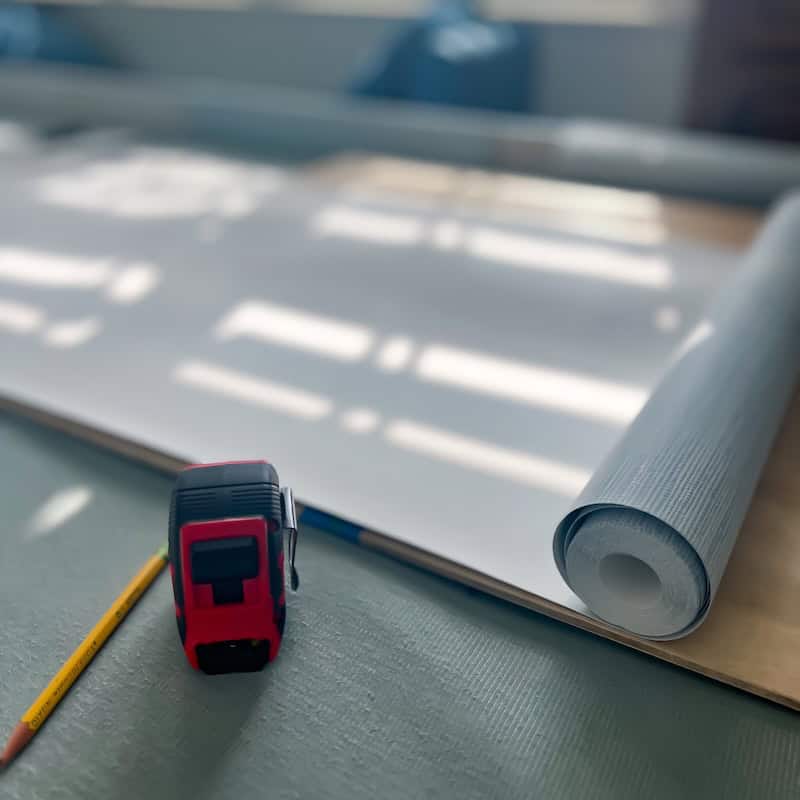
A red and black tape measure next to a yellow pencil on a textured surface, with a roll of gray and white paper in the background and sunlight casting shadows.
Wallpaper is expensive, even one wrong measurement could cost you a whole new roll
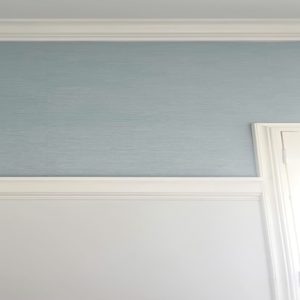
Blue grasscloth wallpaper in a corner of a white wall, with trim installed 3/4 up the wall, ready for paint to be applied. This image showcases the process of wallpaper and matching paint for a cohesive, stylish room design.
Unfortunately I had the opposite problem and had way too much left over

An extra minute with a tape measure is a lot less frustrating than realizing you’ve cut something too short.


3. Buying Materials Before Figuring Out What You Need

You don’t want to get halfway through a project and discover that you’re short on tile, trim, paint, or hardware. But you also don’t want to end up with a pile of expensive materials you don’t need.

Another common mistake is buying materials based on a rough guess. Before shopping, figure out the amount you’ll actually need and account for waste, cuts, and mistakes.

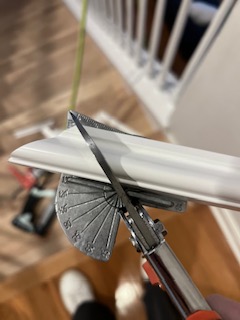
cutting molding with miter shears
Don’t underestimate how many mistakes you can make when cutting molding.
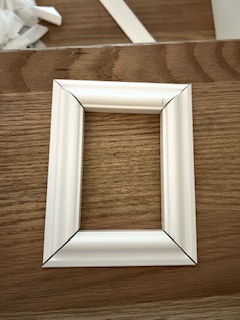
mitered molding box
Caulking these corners when nothing lined up would have been a nightmare.

For some projects, buying a little extra is absolutely worth it. Tile and wallpaper, for example, can be especially frustrating if you run out and discover that the exact color, pattern, or dye lot is no longer available.

And don’t forget to check the dimensions of what you’re buying. A product can look perfect online and still be completely wrong for your project once you see the actual size.

Flat lay of essential DIY painting supplies, featuring high-quality brushes, a paint roller, and painter’s tape, ideal for achieving a flawless home makeover.
Some things are almost always one-time-use like paint roller covers.
cleaning a paint brush with the 4 in 1 comb
But cleaning your paintbrush the right way could make it last a lot longer.

4. Using the Wrong Product for the Job

Just because a product can be used for something doesn’t necessarily mean it’s the best choice for your project.

Paint, primer, stain, adhesive, caulk, and other products are designed for specific surfaces and conditions.

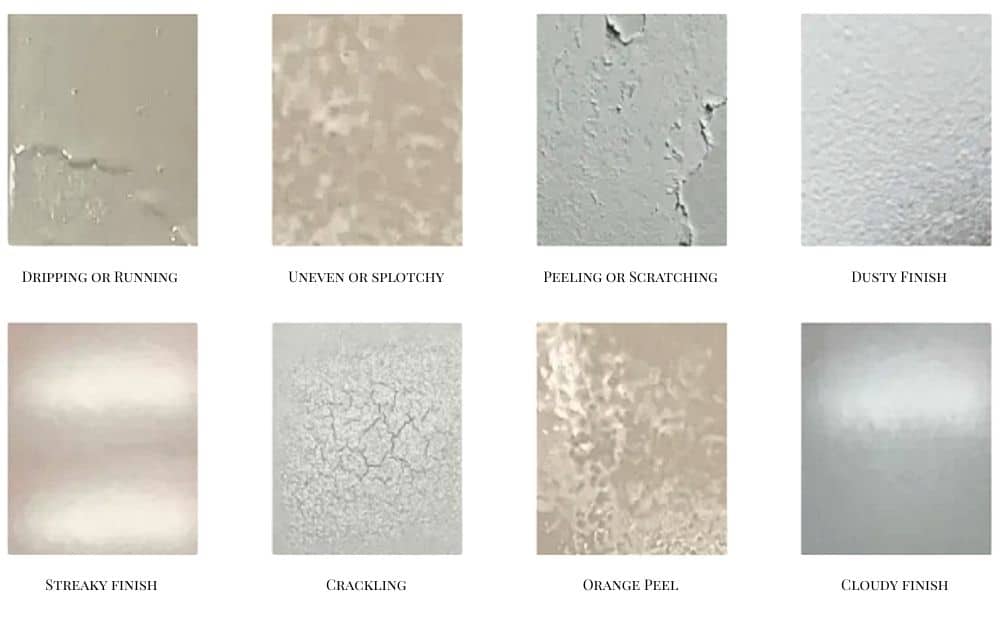
For example, the right primer can make a huge difference when you’re painting a difficult surface. And choosing the right type of stain can completely change how a furniture project turns out.

Before using a product, check what surfaces it’s designed for and how it needs to be applied.

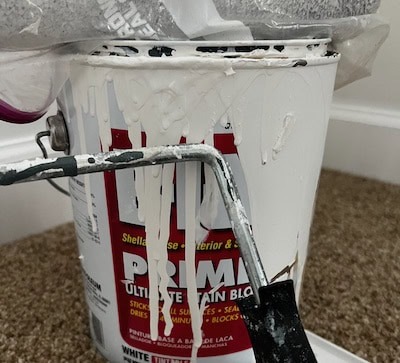
shellac based primer
Shellac based primer is non-toxic when fully cured. Natural shellac resin is actually an organic, edible substance harvested from lac beetles. And you can apply almost any type of paint over it
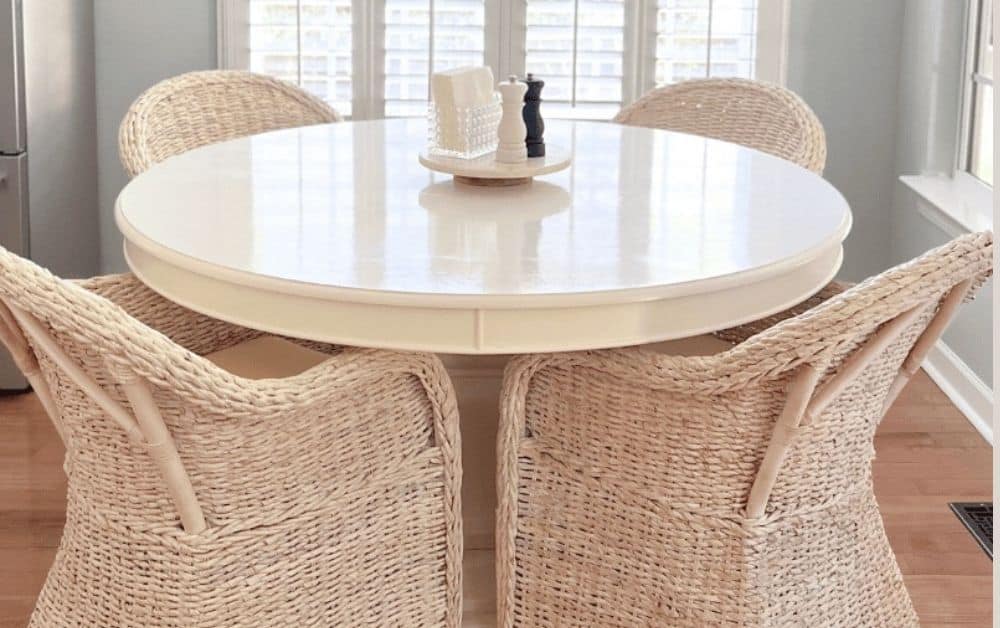
Round white dining table in a sunlit room with large windows.
It is entirely safe for everyday eating surfaces where food sits on plates, bowls, and placemats. Most standard primers are not food-safe or non-toxic, even after they dry completely.

If you’re unsure, read the manufacturer’s instructions. It may not be the most exciting part of a DIY project, but it can save you from having to redo the whole thing.


5. Skipping the Prep Work

I’ve learned that the finished project is often only as good as the preparation underneath it.

I know. Prep work isn’t exactly the fun part. You want to get to the part where you see the transformation. Not spend an hour cleaning, sanding, filling holes, or taping off edges.

tsp cleaner and gloves for cleaning before painting
Skipping prep is one of the easiest ways to end up unhappy with the finished project.
cleaning tools for cabinets including magic eraser toothbrush and cloth
A beautiful finish can’t make up for something that wasn’t properly cleaned or repaired first.

Paint won’t magically hide a dirty or poorly prepared surface. New materials won’t necessarily cover damage underneath.

So clean the surface. Make the repairs. Sand when necessary. Prime when necessary. Give the project a proper foundation before moving on to the fun part.


6. Taking on Too Much Too Soon

You don’t need to be an expert to DIY. But you also don’t need to start with the biggest, most complicated project in your house.

If you’re new to DIY, start with something manageable. A furniture makeover, painting project, simple hardware update, or small room project can teach you a surprising amount.

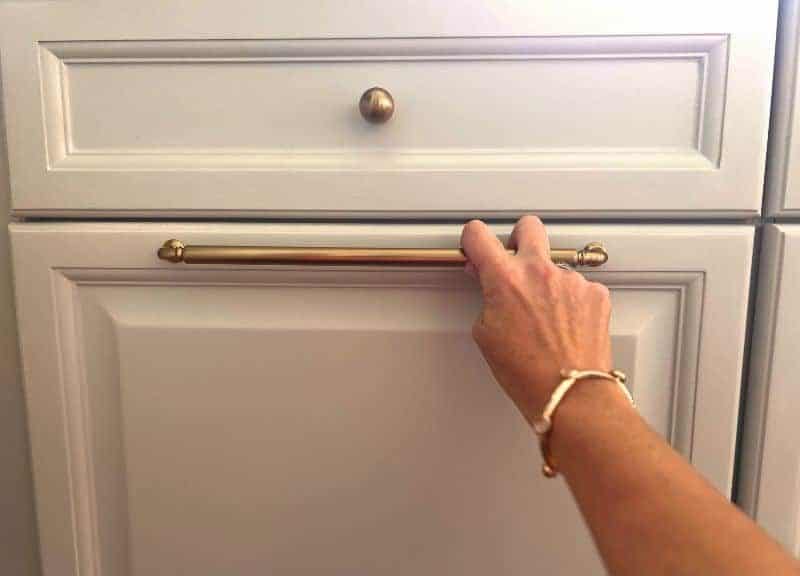
example of cabinet pull measurement showing distance between screw holes
The distance between these two points is your center-to-center measurement
How to measure cabinet pull hole spacing (CTC) accurately for installation.
If the hardware is the same size as the old pulls, this is a very easy project that only requires a screwdriver

Once you’ve figured out how different materials work and become more comfortable using your tools, you can take on bigger projects.

And honestly, making a mistake on a small project is a lot less painful than making the same mistake halfway through a major renovation.


7. Rushing the Project

DIY projects have a way of reminding you that you can’t always rush the process.

This one is particularly hard when you’re ready to see the finished room. Compound needs time between coats, paint needs time to dry before you move furniture, tile mortar needs to set before grout, sealers need to harden before they are protective. Most finishes need additional curing time (not just dry) before they can be handled normally.

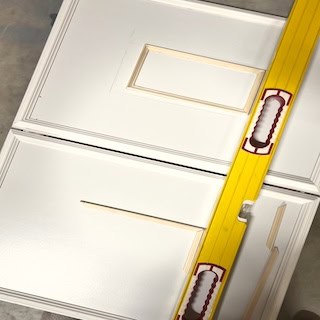
Framing out the cabinet doors with trim molding to cover the cut-out handles.
I made upgraded this shoe cabinet and the glue on the slick melamine surface took forever to dry. Construction adhesive can take 2-7 days to cure.
mitered corners
If the instructions say to wait, wait. I’ve also learned that sometimes the best thing you can do is walk away for the day.

If I’m frustrated, tired, or second-guessing what I’m doing, I’m much more likely to make a mistake. Taking a break and coming back with fresh eyes can make a huge difference.

Close-up of a wallpaper featuring a geometric pattern of octagons outlined in white against a soft gray background, with a slight crease visible.
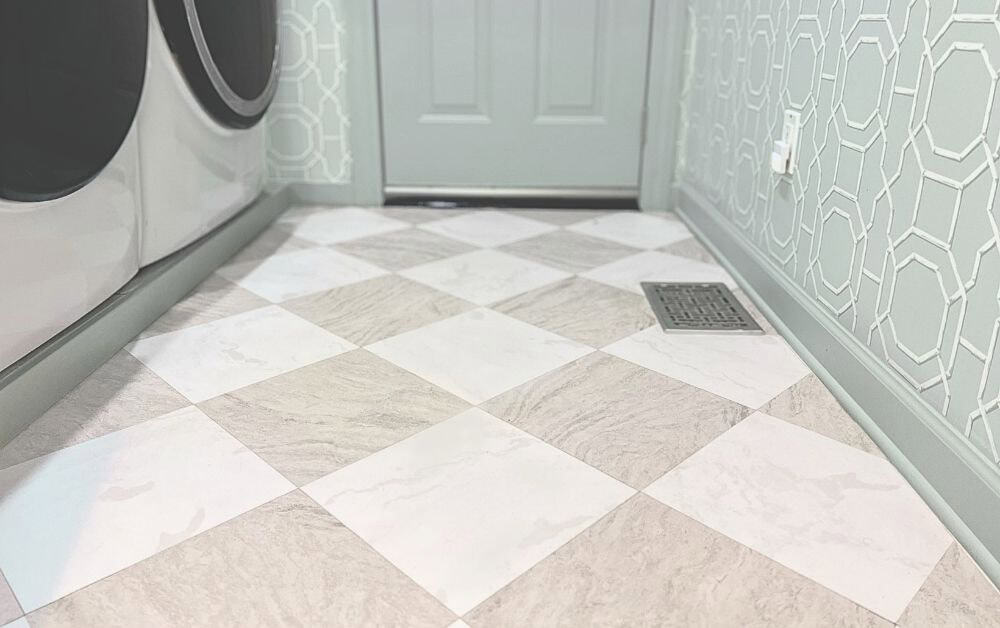
This laundry room made me realize I hate Peel and Stick Wallpaper, I will try to avoid at all costs.
Bright, modern laundry room with peel-and-stick wallpaper showing signs of peeling.
I had to redo 2 entire walls, but I needed to take a serious break in between.

8. Continuing When Something Doesn’t Look Right

If something doesn’t look right, stop. Don’t keep going just because you’ve already spent hours on it.

This may be one of the most important DIY lessons I’ve learned. Maybe the measurements are wrong. Maybe the material isn’t working the way you expected. Maybe something isn’t lining up. Or maybe you simply don’t like how it looks.

using clamps to attach door trim
I couldn’t figure out why the mitered corners weren’t lining up.
thin interior door casing in laundry room
Then I realized the saw needed to be re-calibrated.

Whatever the reason, stopping to figure it out is usually easier than trying to fix a much bigger problem later. Sometimes the answer is as simple as making a small adjustment. Other times, you may need to let a professional handle it.

That’s frustrating, but it’s better than finishing the project and realizing you knew something was wrong the entire time.


9. Expecting Every DIY Project to Be Perfect

There is a lot of pressure online to make every DIY project look perfect. Real DIY doesn’t always work that way.

Perfect paint lines. Perfect furniture makeovers. Perfect rooms. Perfect before-and-after photos.

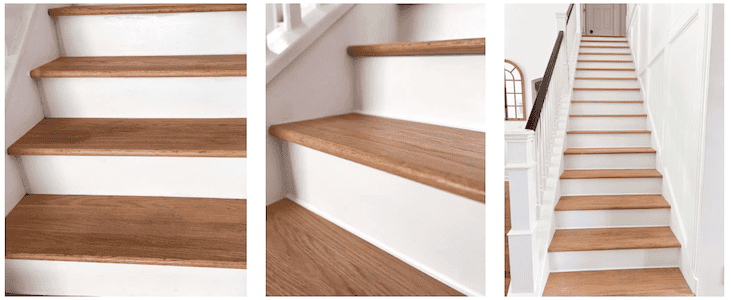
instatrim before after
We replaced the carpeted stairs with wood treads, but the seams weren’t perfect. We lived with it for almost 2 years before we fixed it with Instatrim.

Sometimes you make a mistake. Sometimes you have to redo something. Sometimes the project takes twice as long as you expected. But honestly, that can happen whether you’re doing the work yourself or paying someone else to do it.

The difference is that when you’re DIYing, you’re learning as you go. And that’s okay. The goal isn’t to get every project perfect the first time. It’s to learn from the mistakes so you don’t keep making the expensive ones.


My Best Advice for Avoiding Renovation Mistakes

If I could narrow everything I’ve learned down to a few simple rules, they would be these:

  • Plan before you start.
  • Use the right product for the job.
  • Don’t skip the prep work.
  • And if something doesn’t look right, stop.

The more projects you take on, the better you get at spotting problems before they become big ones. That’s when DIY starts getting a whole lot easier.


Latest Projects

Check Out My Latest Home Makeovers and DIY Transformations

More DIY Ideas

Looking for your next project? Here are a few more DIY ideas, tutorials, and projects to inspire you.

Leave a Reply

Your email address will not be published. Required fields are marked *

I’m Bailey

On Maple Lane logo – black outline graphic of a traditional Southern home with a transparent background

I share renovation projects and smaller DIY’s for real homes. Practical, budget-friendly upgrades and step-by-step projects you can actually do yourself.

I hope you find ideas you love, projects you can actually use, and a little inspiration along the way—no matter your style or budget.

recent popular posts

new finds

Project Sources

tiktok https://www.tiktok.com/@onmaplelane

Shop the exact products used in my home and DIY projects.

Let’s connect

Special Offers From Our Affiliate Partners


two pages logo coupon code ONMAPLELANE
exclusive coupon code
ONMAPLELANE
for 22% off
design shop coupon code
DesignShop
Get 2 FREE samples when you sign up here.
vevor coupon code
VEVOR.com
Exclusive Extra 15% Discount for VEVOR US Top Picks
coupon code: VVUSTO
hychika coupon code
hychika coupon code
serwall coupon code
serwall outdoor coupon offers
Serwall Outdoor
coupon code
GOSUMMER
for $50 + 6% off
OUTLET15
Extra 15% Off Selected Clearance Products
ruggable coupon code
Labor Day Sale! Save up to 30% Off
Morris & Co. Sanderson, Mrs. Alice, Scalamandré 
samplize coupon code
Samplize Peel and Stick Paint Samples
20% off orders $45+
Code LDW20
Home / All Posts / Home Renovation Mistakes & When DIY Doesn’t Save You Money

Here are some of the renovation mistakes I’ve learned to watch out for, and how they can end up costing you more time and money.

Doing it yourself is a great way to save money on a home renovation. But a bad measurement, skipping an important step, or buying the wrong material can turn a project that was supposed to save money into one that costs more than it should. Most of the time, the mistake isn’t that you tried to DIY. It’s that you rushed the planning, didn’t measure carefully, or didn’t think through the project before getting started.

Six-photo collage illustrating common DIY mistakes: a miter saw cutting wood at an angle, a black oscillating multi-tool in use, a hand chiseling mortar from a brick wall, a yellow angle finder measuring tool, a grout float smoothing tile grout, and a dark shelving unit being assembled with a power drill.

Disclaimer: This page may contain affiliate links. If you click on one of these links and make a purchase, I may receive a small commission at no extra cost to you. I only recommend products and services that I believe will add value to my readers. See our full Affiliate Disclosure at this link.


1. Starting Without a Plan

One of the easiest renovation mistakes to make is starting before you actually know what you’re doing. An hour of planning is much easier than undoing an entire afternoon of work.
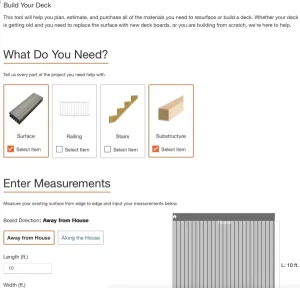
It’s tempting to grab your tools and get started, especially when you’re excited about a project. But taking a little time to figure out the steps first can save you a lot of trouble later.

Before I start a project, I try to figure out what tools and materials I need, what order everything needs to happen, how long I realistically think it will take. And then I compare that to quotes.

I also look at the instructions for any products I’m using before I buy them. There have been plenty of times when I’ve changed my plan after realizing a product wasn’t going to work the way I expected.

Outdoor shower with white enclosure
I planned on building the enclosure for our outdoor shower.
white outdoor shower enclosure on floating composite deck
But after tons of research it was lot cheaper and easier to just buy this Zippity Outdoor Enclosure

2. Measuring Once

You’ve probably heard the old saying: measure twice, cut once. Incorrect measurements can cause all kinds of problems, from wasted materials to things that simply don’t fit.

This is especially important for projects involving tile, wallpaper, trim, shelving, curtains, and furniture.
A red and black tape measure next to a yellow pencil on a textured surface, with a roll of gray and white paper in the background and sunlight casting shadows.
Wallpaper is expensive, even one wrong measurement could cost you a whole new roll
Blue grasscloth wallpaper in a corner of a white wall, with trim installed 3/4 up the wall, ready for paint to be applied. This image showcases the process of wallpaper and matching paint for a cohesive, stylish room design.
Unfortunately I had the opposite problem and had way too much left over

An extra minute with a tape measure is a lot less frustrating than realizing you’ve cut something too short.


3. Buying Materials Before Figuring Out What You Need

You don’t want to get halfway through a project and discover that you’re short on tile, trim, paint, or hardware. But you also don’t want to end up with a pile of expensive materials you don’t need.

Another common mistake is buying materials based on a rough guess. Before shopping, figure out the amount you’ll actually need and account for waste, cuts, and mistakes.
cutting molding with miter shears
Don’t underestimate how many mistakes you can make when cutting molding.
mitered molding box
Caulking these corners when nothing lined up would have been a nightmare.

For some projects, buying a little extra is absolutely worth it. Tile and wallpaper, for example, can be especially frustrating if you run out and discover that the exact color, pattern, or dye lot is no longer available.

And don’t forget to check the dimensions of what you’re buying. A product can look perfect online and still be completely wrong for your project once you see the actual size.

Flat lay of essential DIY painting supplies, featuring high-quality brushes, a paint roller, and painter’s tape, ideal for achieving a flawless home makeover.
Some things are almost always one-time-use like paint roller covers.
cleaning a paint brush with the 4 in 1 comb
But cleaning your paintbrush the right way could make it last a lot longer.

4. Using the Wrong Product for the Job

Just because a product can be used for something doesn’t necessarily mean it’s the best choice for your project.

Paint, primer, stain, adhesive, caulk, and other products are designed for specific surfaces and conditions.
For example, the right primer can make a huge difference when you’re painting a difficult surface. And choosing the right type of stain can completely change how a furniture project turns out.

Before using a product, check what surfaces it’s designed for and how it needs to be applied.
shellac based primer
Shellac based primer is non-toxic when fully cured. Natural shellac resin is actually an organic, edible substance harvested from lac beetles. And you can apply almost any type of paint over it
Round white dining table in a sunlit room with large windows.
It is entirely safe for everyday eating surfaces where food sits on plates, bowls, and placemats. Most standard primers are not food-safe or non-toxic, even after they dry completely.

If you’re unsure, read the manufacturer’s instructions. It may not be the most exciting part of a DIY project, but it can save you from having to redo the whole thing.


5. Skipping the Prep Work

I’ve learned that the finished project is often only as good as the preparation underneath it.

I know. Prep work isn’t exactly the fun part. You want to get to the part where you see the transformation. Not spend an hour cleaning, sanding, filling holes, or taping off edges.

tsp cleaner and gloves for cleaning before painting
Skipping prep is one of the easiest ways to end up unhappy with the finished project.
cleaning tools for cabinets including magic eraser toothbrush and cloth
A beautiful finish can’t make up for something that wasn’t properly cleaned or repaired first.

Paint won’t magically hide a dirty or poorly prepared surface. New materials won’t necessarily cover damage underneath.

So clean the surface. Make the repairs. Sand when necessary. Prime when necessary. Give the project a proper foundation before moving on to the fun part.


6. Taking on Too Much Too Soon

You don’t need to be an expert to DIY. But you also don’t need to start with the biggest, most complicated project in your house.

If you’re new to DIY, start with something manageable. A furniture makeover, painting project, simple hardware update, or small room project can teach you a surprising amount.

example of cabinet pull measurement showing distance between screw holes
The distance between these two points is your center-to-center measurement
How to measure cabinet pull hole spacing (CTC) accurately for installation.
If the hardware is the same size as the old pulls, this is a very easy project that only requires a screwdriver

Once you’ve figured out how different materials work and become more comfortable using your tools, you can take on bigger projects.

And honestly, making a mistake on a small project is a lot less painful than making the same mistake halfway through a major renovation.


7. Rushing the Project

DIY projects have a way of reminding you that you can’t always rush the process.

This one is particularly hard when you’re ready to see the finished room. Compound needs time between coats, paint needs time to dry before you move furniture, tile mortar needs to set before grout, sealers need to harden before they are protective. Most finishes need additional curing time (not just dry) before they can be handled normally.

Framing out the cabinet doors with trim molding to cover the cut-out handles.
I made upgraded this shoe cabinet and the glue on the slick melamine surface took forever to dry. Construction adhesive can take 2-7 days to cure.
mitered corners
If the instructions say to wait, wait. I’ve also learned that sometimes the best thing you can do is walk away for the day.

If I’m frustrated, tired, or second-guessing what I’m doing, I’m much more likely to make a mistake. Taking a break and coming back with fresh eyes can make a huge difference.

Close-up of a wallpaper featuring a geometric pattern of octagons outlined in white against a soft gray background, with a slight crease visible.
This laundry room made me realize I hate Peel and Stick Wallpaper, I will try to avoid at all costs.
Bright, modern laundry room with peel-and-stick wallpaper showing signs of peeling.
I had to redo 2 entire walls, but I needed to take a serious break in between.

8. Continuing When Something Doesn’t Look Right

If something doesn’t look right, stop. Don’t keep going just because you’ve already spent hours on it.

This may be one of the most important DIY lessons I’ve learned. Maybe the measurements are wrong. Maybe the material isn’t working the way you expected. Maybe something isn’t lining up. Or maybe you simply don’t like how it looks.

using clamps to attach door trim
I couldn’t figure out why the mitered corners weren’t lining up.
thin interior door casing in laundry room
Then I realized the saw needed to be re-calibrated.

Whatever the reason, stopping to figure it out is usually easier than trying to fix a much bigger problem later. Sometimes the answer is as simple as making a small adjustment. Other times, you may need to let a professional handle it.

That’s frustrating, but it’s better than finishing the project and realizing you knew something was wrong the entire time.


9. Expecting Every DIY Project to Be Perfect

There is a lot of pressure online to make every DIY project look perfect. Real DIY doesn’t always work that way.

Perfect paint lines. Perfect furniture makeovers. Perfect rooms. Perfect before-and-after photos.
instatrim before after
We replaced the carpeted stairs with wood treads, but the seams weren’t perfect. We lived with it for almost 2 years before we fixed it with Instatrim.

Sometimes you make a mistake. Sometimes you have to redo something. Sometimes the project takes twice as long as you expected. But honestly, that can happen whether you’re doing the work yourself or paying someone else to do it.

The difference is that when you’re DIYing, you’re learning as you go. And that’s okay. The goal isn’t to get every project perfect the first time. It’s to learn from the mistakes so you don’t keep making the expensive ones.


My Best Advice for Avoiding Renovation Mistakes

If I could narrow everything I’ve learned down to a few simple rules, they would be these:

  • Plan before you start.
  • Use the right product for the job.
  • Don’t skip the prep work.
  • And if something doesn’t look right, stop.

The more projects you take on, the better you get at spotting problems before they become big ones. That’s when DIY starts getting a whole lot easier.


Latest Projects

Check Out My Latest Home Makeovers and DIY Transformations

More DIY Ideas

Looking for your next project? Here are a few more DIY ideas, tutorials, and projects to inspire you.
Leave a Reply

Your email address will not be published. Required fields are marked *