

Discover how Rub ‘n Buff can magically transform your everyday items into stunning decor
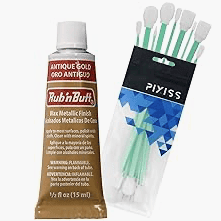
You’ve probably heard of Rub and Buff (Rub ‘n Buff). The little tube of metallic wax that can turn anything into metal with barely any effort. It’s my favorite tool for giving things a quick makeover.
But there’s so much more you can do with it than just freshening up picture frames. In this post, I’m sharing uncommon ways to use Rub ‘n Buff that you might not have thought of, plus the best tips for getting those results to last (and what surfaces to avoid).
Table of Contents
Rub and Buff (Rub ‘n Buff ) comes in 9 shades:

- Antique Gold – A rich, warm hue with a deep golden tone.
- Autumn Gold – A warm bronze with a golden undertone.
- Ebony – A subtle black with metallic sheen.
- European Gold – A softer, muted gold with a cool undertone
- Gold Leaf – A warmer gold (the most popular color for achieving a classic gold finish)
- Grecian Gold –A warm, metallic gold with subtle undertones of bronze
- Pewter – Darker, moodier metallic.
- Silver Leaf – Classic, shiny silver.
- Spanish Copper – A rich warm copper

7 Surprising Ways to use Rub and Buff
1. Door Hardware and Hinges


Most people don’t give door hinges a second thought, but they should match your hardware. Try Antique Gold or Grecian Gold on older hinges to give them a fresh update.
2. Bathroom Fixtures


New faucets and towel bars can be pricey, but with a little Rub ‘n Buff, you can update your bathroom without buying a new one. Use Pewter, Gold Leaf or Silver Leaf just be sure to seal them to protect against moisture!
3. Planters


Plain ceramic or plastic planters can look so much better with Rub ‘n Buff. I would spray paint the planter first with a bonding primer and then use Spanish Copper or Autumn Gold to achieve this look.
4. Furniture Legs


Don’t forget about the legs on your furniture! Whether you’ve got a side table, dining chairs, or a bed frame, a quick coat of Gold Leaf or Silver leaf to match your hardware.
5. Wood Molding and Trim


If you’ve got intricate trim that needs a little something extra, Rub ‘n Buff in Grecian Gold or European Gold can bring out those details. It’s especially great for molding and trim on furniture.
6. Light Switch Plates

Switch plates are another overlooked detail, but the toggle and the plate don’t match, they can really stand out. Gold Leaf or Ebony are great options to give your light switch covers an updated look without much effort.


7. Holiday Décor


Whether it’s a fall wreath or Christmas ornaments, Rub ‘n Buff can give your seasonal decorations new life. Try Gold Leaf, or Spanish Copper on old ornaments, bells, or nutcrackers.


Best Tips for Applying Rub ‘n Buff and Getting Results That Last
Now that we’ve covered what you can do with Rub ‘n Buff, let’s talk about how to apply it so it stays looking good for the long haul.
Time needed: 10 minutes
How to Apply Rub N Buff
- Clean Your Surface
Start with a clean, dry surface. Remove dirt or grime, especially on metal or wood. Use rubbing alcohol for a quick wipe-down.
- Apply Sparingly
A little goes a long way! Use a tiny dab and build up as needed. Apply with a Q-tip or a gloved finger.
- Buff It Out
Use a soft cloth (or your fingers) to buff it into the surface for a smooth, polished finish.
- Let It Dry
For high-use or moisture-prone areas, seal with a spray polyurethane in clear gloss or semi-gloss to protect the finish.


Disclaimer: This page may contain affiliate links. If you click on one of these links and make a purchase, I may receive a small commission at no extra cost to you. I only recommend products and services that I believe will add value to my readers. See our full Affiliate Disclosure at this link.

Where You Shouldn’t Use Rub ‘n Buff
Even though Rub ‘n Buff is pretty magical, it’s not perfect for everything. Here’s where to avoid using it:
- Outdoors (Unsealed) – Sun and rain will fade it, so always use a waterproof sealer.
- High-Touch Surfaces (Unsealed) – Doorknobs and drawer pulls can wear down fast. Seal for durability.
- Fabric & Soft Materials – It won’t stick well and may stain or flake off.
FAQs About Rub ‘n Buff
A little goes a long way! Apply a small amount using your gloved fingertip, a q-tip, or a paint brush. Buff it out in circular motions for a smooth, even finish.
I rarely do, but I would definitely use a degreaser to make sure the surface is clean. If the surface is super glossy, a light sanding can help with adhesion.
Sealing isn’t always necessary, but for high-touch areas (like handles or faucets) or outdoor projects, a clear sealer will help protect the finish and keep it from rubbing off.
More Easy & Quick DIYs
Paint, peel-and-stick, hardware swaps, and small upgrades that make a big difference.


