Home / All Posts / How to Hide Your Electrical Panel or Fuse Box

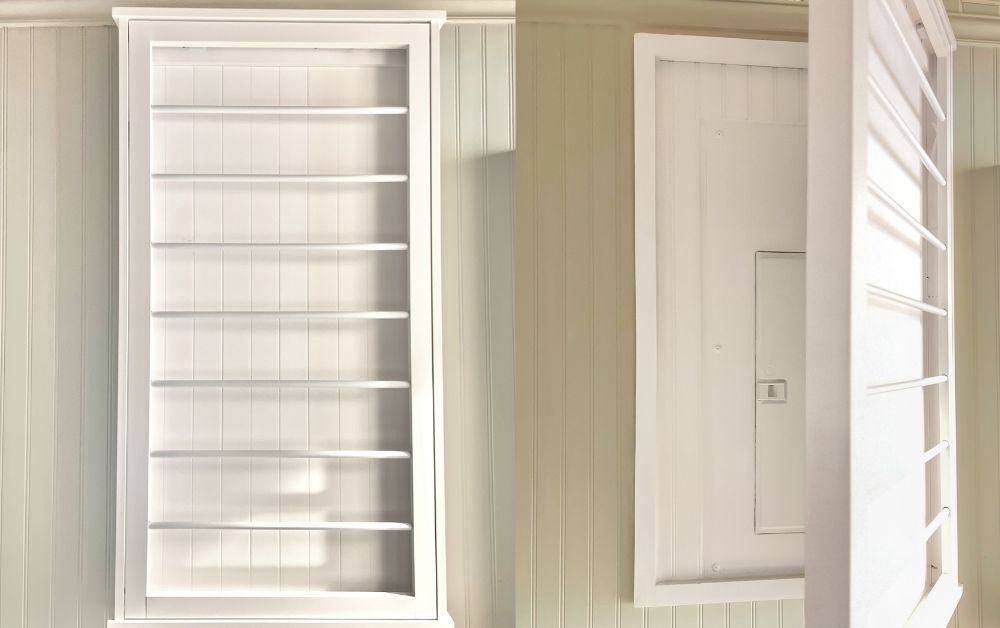
We have the large electrical panel in our laundry room, and it’s an eyesore. I couldn’t find any how-to instructions on how to hide a circuit breaker box, besides art or a mirror. But I didn’t want to sacrifice useful wall space for something decorative. It sat right in the middle of the wall. The panel was taking up a lot of usable space in a very narrow laundry room.

I looked into different ways to hide it, but most options were either expensive, too bulky, or didn’t really look like they belonged in the space. I wanted something simple, affordable, and clean-looking, but also functional.

Before & After
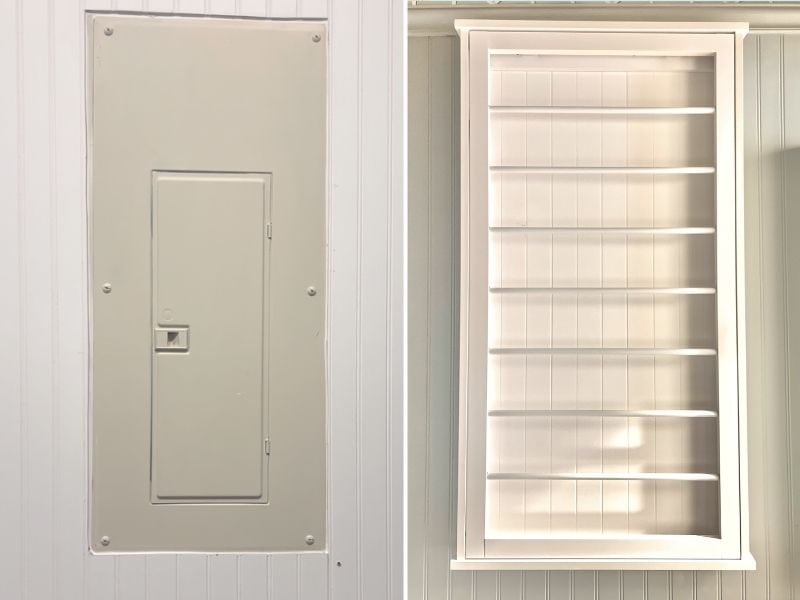
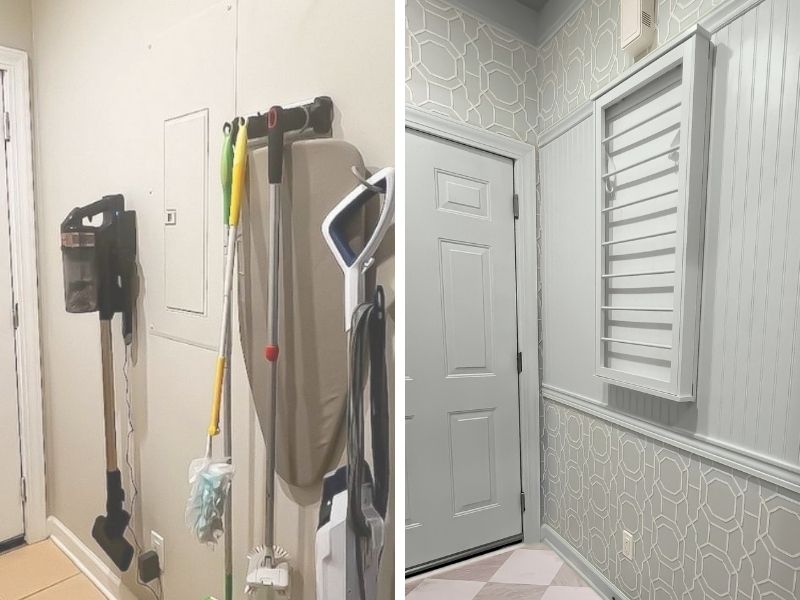
An image showing a wall panel with a door to an electrical panel on the left and an after image of it being hidden with a drying rack on the right.
Before: Blah gray panel, taking up prime real estate in an already narrow laundry room 
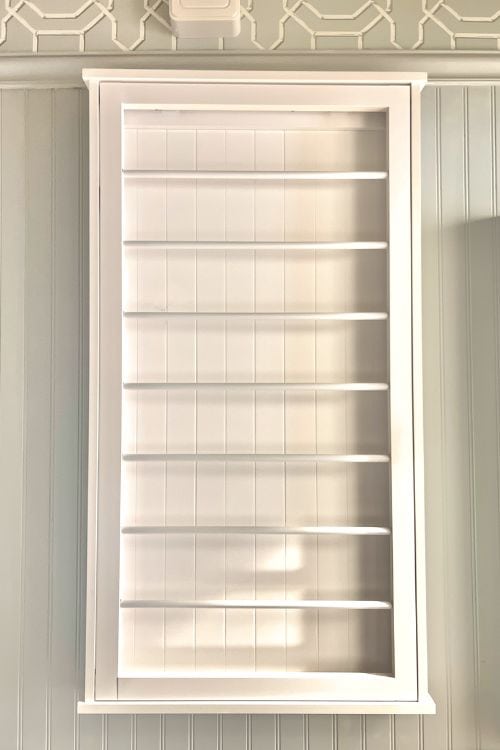
After: Functional solution to an eyesore 

So I came up with a solution using basic materials and a little creativity, and the total cost came in under $70.

What You’ll Love About This DIY

  • Uses materials you can find at any hardware store
  • Costs less than a night out
  • Gives you a finished look, not a hack

Click here to see how I prepped the wall by installing beadboard , it’s a must-read before starting this project! And more Laundry Room Projects below

A collage showcasing a stylish laundry room design, featuring various materials and decor items such as tiles, storage baskets, and accessories, with the text 'SHOP THE LAUNDRY ROOM' prominently displayed.

Before & After

LAUNDRY ROOM RENOVATION


Laundry Room Projects

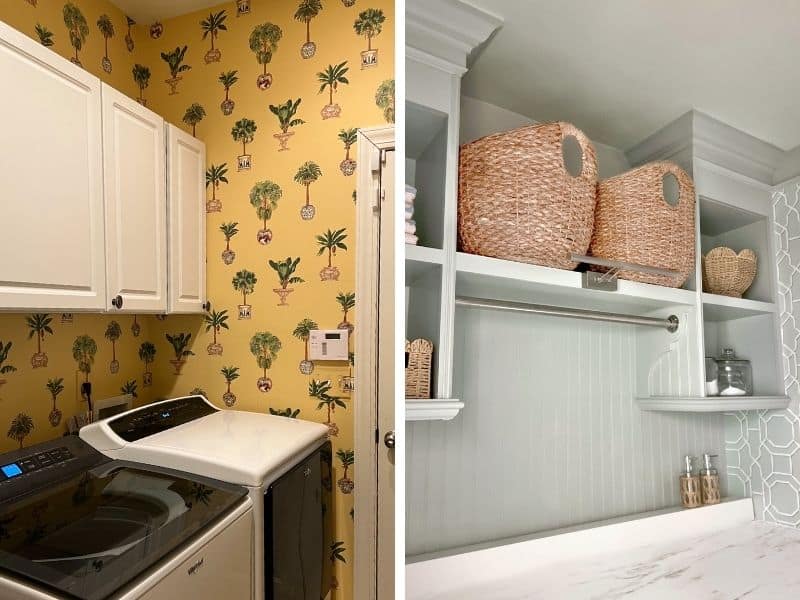
If you’re laundry room is too narrow, or you’re lacking space anywhere I have some creative fixes to maximize space in this hard-working room.

Hide a Circuit Breaker Box with A Drying Rack
Disclaimer: This page may contain affiliate links. If you click on one of these links and make a purchase, I may receive a small commission at no extra cost to you. I only recommend products and services that I believe will add value to my readers. See our full Affiliate Disclosure at this link.


Here’s what you’ll need for this project:

Materials
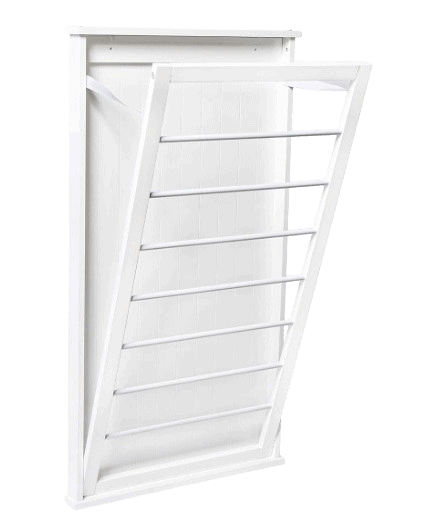
over-the-door collapsible drying rack is the perfect fit for your laundry room, bedroom or bathroom. Hang or dry clothes easily by simply opening up the rack, and then when done, fold it back up to minimize its intrusion on your space. The white finish matches any décor and when it's folded up you won't even know it's there.
12 Pack Ultra Thin Cabinet Door Catch Stainless Steel
2 inch mini hinges The folding hinge are made of 304 stainless steel.

Tools

A DEWALT random orbit sander with a black carrying case.
A cordless drill with a red and black design, featuring a lithium-ion battery and a keyless chuck.
A set of two black framing squares used for measuring angles, with engraved markings and measurements.
Two spirit levels with yellow bodies and red vials, one positioned above the other.
A yellow and black measuring tool with a circular clamp and a handle, used for measuring pipe diameters or similar applications.
A Zircon A100 electronic stud finder, featuring a bright yellow casing and a digital display indicating detection readiness, designed for locating studs and other materials behind walls.

I used pocket holes to assemble to frame, but you could glue and nail it. If you want to go the hidden fastener route you will need: 


Step-by-Step Guide: How to Hide Electrical Panel

@onmaplelane

“Day 5 of tackling unfinished DIY projects… Did I say the days had to be consecutive? Just kidding! I’m back at it and finally built a drying rack to cover that ugly fuse box. Functional AND stylish—who knew hiding something ugly could look this good? And be functional? Would you try this in your laundry room? 🛠️ #diyhomeprojects #day5of30 laundryroomdiy” #30daydiychallenge #diyunfinishedchallenge

♬ The Laundry Song by Alice Ella – ItsAliceElla

Want to see more DIY projects in real time? Follow me on Tik Tok for behind-the-scenes renovation updates, quick DIY tips, and projects that don’t always make it onto the blog.

Step 1: Build the Frame

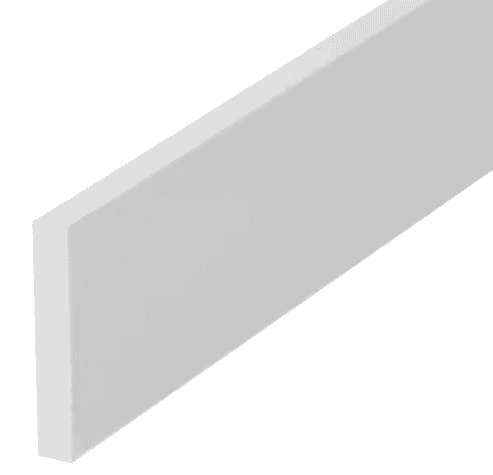
To start, I built a simple rectangular frame to hide circuit breaker box using 1×2 wood boards. This frame serves as the base for attaching the drying rack.

  1. Measure the dimensions of the drying rack and the area around your fuse box. The measurements were 23″ wide and 42″ tall
    • 2 boards cut @ 23″
    • 2 cut @ 42″.
  2. Cut 4 wood boards to size and  sand the edges.
  3. Mark holes on the top and bottom pieces for the pocket holes
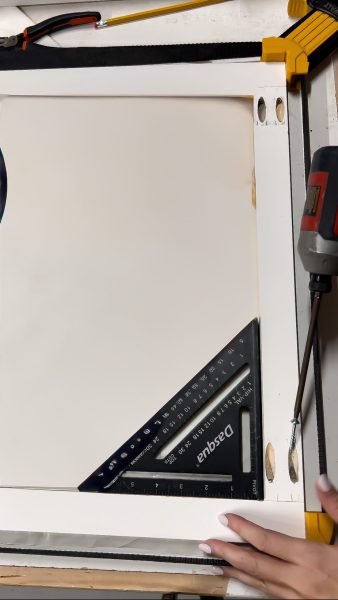
  4. Drill  pocket holes in two of of the wood boards (each piece should have 4 holes – 2 at each end) *see picture
  5. Assemble the frame using pocket hole screws, pocket hole drill bit (it comes with the kreg jig set) and power drill, ensuring the corners are square. I used glue with  miter clamps to keep the frame square, but regular clamps could also work. 
  6. Paint the frame to match the drying rack, I had leftover paint from  my closet project which was color matched to white melamine. It was a pretty close match for  this drying rack.

Step 2: Find the Studs and Avoid Electrical Hazards

Before attaching anything to the wall, I used a stud finder to locate the studs behind the fuse box area.

Before drilling, I used this specific stud finder with AC detection so I could locate studs and avoid any wires behind the wall. The Zircon StudSensor A100 is a reliable, budget-friendly choice for this.

Zircon StudSensor A100 Stud Finder and Wall Scanner – Edge Locating Stud Detector with WireWarning AC Detection
  1. Mark the studs with a pencil.
  2. Double-check the fuse box’s layout and avoid drilling near any wires or conduit.
  3. Turn off the power
  4. Drill carefully

I recommend consulting with an electrician if you are unsure of the wiring behind your wall.


Step 3: Attach the Frame to the Wall

Once I located the studs, I positioned the frame over the fuse box and secured it to the wall using screws.

  • Drill pilot holes in the frame to prevent splitting the wood. Because I did not do that, and I had to repair the frame. Which set me back big time.
  • Use screws to anchor the frame into the studs for maximum support. I had to keep in mind the thickness of the beadboard I had added from my utility wall project.
A person using a tape dispenser to apply tape on a large brown paper board mounted against a wall.

Step 4: Add the Hinges and Drying Rack

over-the-door collapsible drying rack is the perfect fit for your laundry room, bedroom or bathroom. Hang or dry clothes easily by simply opening up the rack, and then when done, fold it back up to minimize its intrusion on your space. The white finish matches any décor and when it's folded up you won't even know it's there.
2.25″D x 23″W x 42″H

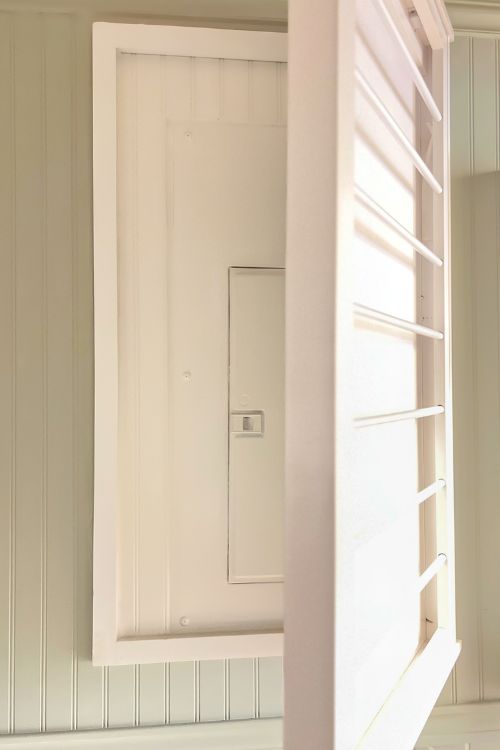
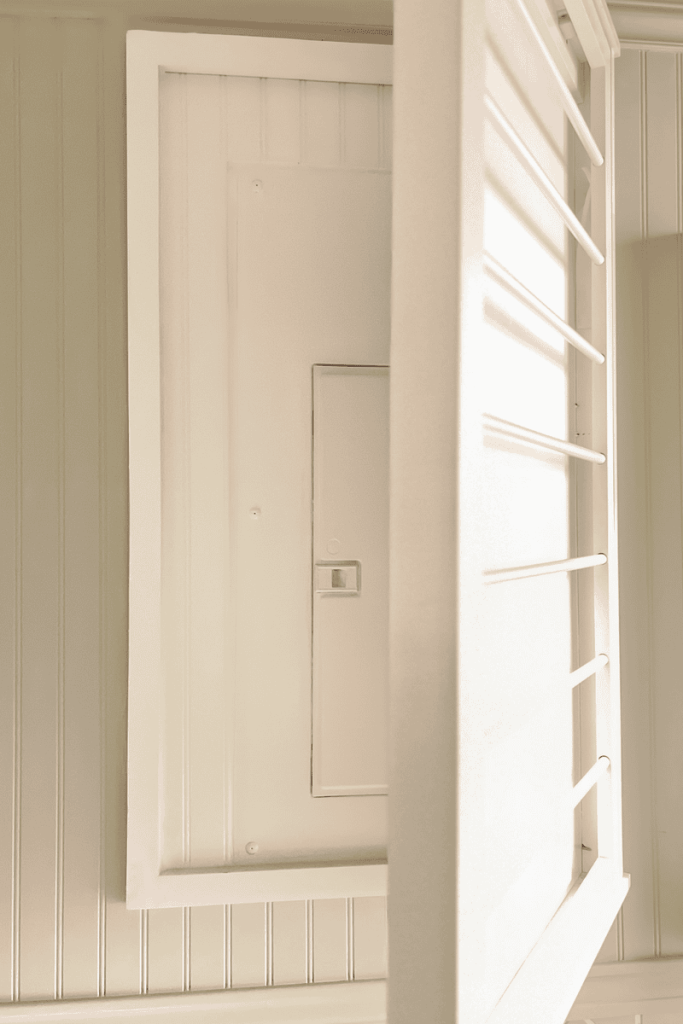
To make the drying rack functional, I attached hinges to the sides of the frame. This allowed it to open up like a door when we need to access the circuit breakers.

  1. Align the hinges on the side edge of the drying rack and the frame.
  2. Secure the hinges with screws.
  3. Test the movement to ensure the rack folds smoothly and sits flush when closed.
2 inch mini hinges The folding hinge are made of 304 stainless steel.
Hidden electrical panel behind a clean wall in a modern home.

Step 5: Install the Magnetic Latch

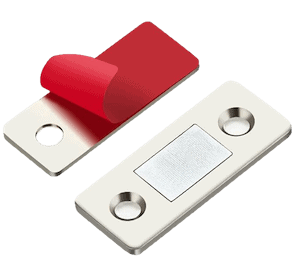
12 Pack Ultra Thin Cabinet Door Catch Stainless Steel

To keep the drying rack closed and snug against the wall, I added a magnetic latch at the top and bottom of the frame.

  1. Position the magnet on the top and bottom left of the frame and attach it with screws.
  2. Secure the metal plate on the back of the drying rack to align with the magnet. These magnets that I bought from amazon have a sticky mounting template so you can make sure it lines up correctly.
  3. Test the latch to ensure it holds the rack in place when not in use.

Easy DIY Fix: How to Hide a Circuit Breaker Box with a Wall-Mounted Drying Rack

Hanging clothing on a wooden drying rack in a softly lit room with patterned wallpaper.
A white wooden display cabinet with multiple horizontal shelves, set against a light-colored wall with a decorative pattern.
A partially open white wooden door or panel revealing a hidden compartment with a small latch, set against a light-colored wall with beadboard paneling.

This ended up being one of those small projects that made a bigger difference than I expected. The breaker box is still easy to access, but now it actually looks like it belongs in the room instead of something I was trying to ignore. If you have one in an awkward spot too, this is an easy and affordable way to clean it up without any major work.

Everything I used in my Laundry Room Renovation


Latest Projects

Check Out My Latest Home Makeovers and DIY Transformations

More Ideas

If you’ve got more time for home improvement ideas check out these projects.

Something went wrong. Please refresh the page and/or try again.

Leave a Reply

Your email address will not be published. Required fields are marked *

I’m Bailey

On Maple Lane logo – black outline graphic of a traditional Southern home with a transparent background

I share renovation projects and smaller DIY’s for real homes. Practical, budget-friendly upgrades and step-by-step projects you can actually do yourself.

I hope you find ideas you love, projects you can actually use, and a little inspiration along the way—no matter your style or budget.

recent popular posts

new finds

Project Sources

tiktok https://www.tiktok.com/@onmaplelane

Shop the exact products used in my home and DIY projects.

Let’s connect

Special Offers From Our Affiliate Partners


two pages logo coupon code ONMAPLELANE
exclusive coupon code
ONMAPLELANE
for 22% off
design shop coupon code
DesignShop
Get 2 FREE samples when you sign up here.
vevor coupon code
VEVOR.com
Exclusive Extra 15% Discount for VEVOR US Top Picks
coupon code: VVUSTO
hychika coupon code
hychika coupon code
serwall coupon code
serwall outdoor coupon offers
Serwall Outdoor
coupon code
GOSUMMER
for $50 + 6% off
OUTLET15
Extra 15% Off Selected Clearance Products
ruggable coupon code
Labor Day Sale! Save up to 30% Off
Morris & Co. Sanderson, Mrs. Alice, Scalamandré 
samplize coupon code
Samplize Peel and Stick Paint Samples
20% off orders $45+
Code LDW20
Home / All Posts / How to Hide Your Electrical Panel or Fuse Box

We have the large electrical panel in our laundry room, and it’s an eyesore. I couldn’t find any how-to instructions on how to hide a circuit breaker box, besides art or a mirror. But I didn’t want to sacrifice useful wall space for something decorative. It sat right in the middle of the wall. The panel was taking up a lot of usable space in a very narrow laundry room.

I looked into different ways to hide it, but most options were either expensive, too bulky, or didn’t really look like they belonged in the space. I wanted something simple, affordable, and clean-looking, but also functional.

Before & After

An image showing a wall panel with a door to an electrical panel on the left and an after image of it being hidden with a drying rack on the right.
Before: Blah gray panel, taking up prime real estate in an already narrow laundry room 
After: Functional solution to an eyesore 

So I came up with a solution using basic materials and a little creativity, and the total cost came in under $70.

What You’ll Love About This DIY

  • Uses materials you can find at any hardware store
  • Costs less than a night out
  • Gives you a finished look, not a hack

Click here to see how I prepped the wall by installing beadboard , it’s a must-read before starting this project! And more Laundry Room Projects below


Hide a Circuit Breaker Box with A Drying Rack

Disclaimer: This page may contain affiliate links. If you click on one of these links and make a purchase, I may receive a small commission at no extra cost to you. I only recommend products and services that I believe will add value to my readers. See our full Affiliate Disclosure at this link.


Here’s what you’ll need for this project:

Materials
over-the-door collapsible drying rack is the perfect fit for your laundry room, bedroom or bathroom. Hang or dry clothes easily by simply opening up the rack, and then when done, fold it back up to minimize its intrusion on your space. The white finish matches any décor and when it's folded up you won't even know it's there.
12 Pack Ultra Thin Cabinet Door Catch Stainless Steel
2 inch mini hinges The folding hinge are made of 304 stainless steel.

Tools

A DEWALT random orbit sander with a black carrying case.
A cordless drill with a red and black design, featuring a lithium-ion battery and a keyless chuck.
A set of two black framing squares used for measuring angles, with engraved markings and measurements.
Two spirit levels with yellow bodies and red vials, one positioned above the other.
A yellow and black measuring tool with a circular clamp and a handle, used for measuring pipe diameters or similar applications.
A Zircon A100 electronic stud finder, featuring a bright yellow casing and a digital display indicating detection readiness, designed for locating studs and other materials behind walls.

I used pocket holes to assemble to frame, but you could glue and nail it. If you want to go the hidden fastener route you will need: 


Step-by-Step Guide: How to Hide Electrical Panel

@onmaplelane

“Day 5 of tackling unfinished DIY projects… Did I say the days had to be consecutive? Just kidding! I’m back at it and finally built a drying rack to cover that ugly fuse box. Functional AND stylish—who knew hiding something ugly could look this good? And be functional? Would you try this in your laundry room? 🛠️ #diyhomeprojects #day5of30 laundryroomdiy” #30daydiychallenge #diyunfinishedchallenge

♬ The Laundry Song by Alice Ella – ItsAliceElla

Want to see more DIY projects in real time? Follow me on Tik Tok for behind-the-scenes renovation updates, quick DIY tips, and projects that don’t always make it onto the blog.

Step 1: Build the Frame

To start, I built a simple rectangular frame to hide circuit breaker box using 1×2 wood boards. This frame serves as the base for attaching the drying rack.

  1. Measure the dimensions of the drying rack and the area around your fuse box. The measurements were 23″ wide and 42″ tall
    • 2 boards cut @ 23″
    • 2 cut @ 42″.
  2. Cut 4 wood boards to size and  sand the edges.
  3. Mark holes on the top and bottom pieces for the pocket holes
  4. Drill  pocket holes in two of of the wood boards (each piece should have 4 holes – 2 at each end) *see picture
  5. Assemble the frame using pocket hole screws, pocket hole drill bit (it comes with the kreg jig set) and power drill, ensuring the corners are square. I used glue with  miter clamps to keep the frame square, but regular clamps could also work. 
  6. Paint the frame to match the drying rack, I had leftover paint from  my closet project which was color matched to white melamine. It was a pretty close match for  this drying rack.

Step 2: Find the Studs and Avoid Electrical Hazards

Before attaching anything to the wall, I used a stud finder to locate the studs behind the fuse box area.

Before drilling, I used this specific stud finder with AC detection so I could locate studs and avoid any wires behind the wall. The Zircon StudSensor A100 is a reliable, budget-friendly choice for this.

Zircon StudSensor A100 Stud Finder and Wall Scanner – Edge Locating Stud Detector with WireWarning AC Detection
  1. Mark the studs with a pencil.
  2. Double-check the fuse box’s layout and avoid drilling near any wires or conduit.
  3. Turn off the power
  4. Drill carefully

I recommend consulting with an electrician if you are unsure of the wiring behind your wall.


Step 3: Attach the Frame to the Wall

Once I located the studs, I positioned the frame over the fuse box and secured it to the wall using screws.

  • Drill pilot holes in the frame to prevent splitting the wood. Because I did not do that, and I had to repair the frame. Which set me back big time.
  • Use screws to anchor the frame into the studs for maximum support. I had to keep in mind the thickness of the beadboard I had added from my utility wall project.
A person using a tape dispenser to apply tape on a large brown paper board mounted against a wall.

Step 4: Add the Hinges and Drying Rack

over-the-door collapsible drying rack is the perfect fit for your laundry room, bedroom or bathroom. Hang or dry clothes easily by simply opening up the rack, and then when done, fold it back up to minimize its intrusion on your space. The white finish matches any décor and when it's folded up you won't even know it's there.
2.25″D x 23″W x 42″H

To make the drying rack functional, I attached hinges to the sides of the frame. This allowed it to open up like a door when we need to access the circuit breakers.

  1. Align the hinges on the side edge of the drying rack and the frame.
  2. Secure the hinges with screws.
  3. Test the movement to ensure the rack folds smoothly and sits flush when closed.
2 inch mini hinges The folding hinge are made of 304 stainless steel.
Hidden electrical panel behind a clean wall in a modern home.

Step 5: Install the Magnetic Latch

12 Pack Ultra Thin Cabinet Door Catch Stainless Steel

To keep the drying rack closed and snug against the wall, I added a magnetic latch at the top and bottom of the frame.

  1. Position the magnet on the top and bottom left of the frame and attach it with screws.
  2. Secure the metal plate on the back of the drying rack to align with the magnet. These magnets that I bought from amazon have a sticky mounting template so you can make sure it lines up correctly.
  3. Test the latch to ensure it holds the rack in place when not in use.

Easy DIY Fix: How to Hide a Circuit Breaker Box with a Wall-Mounted Drying Rack
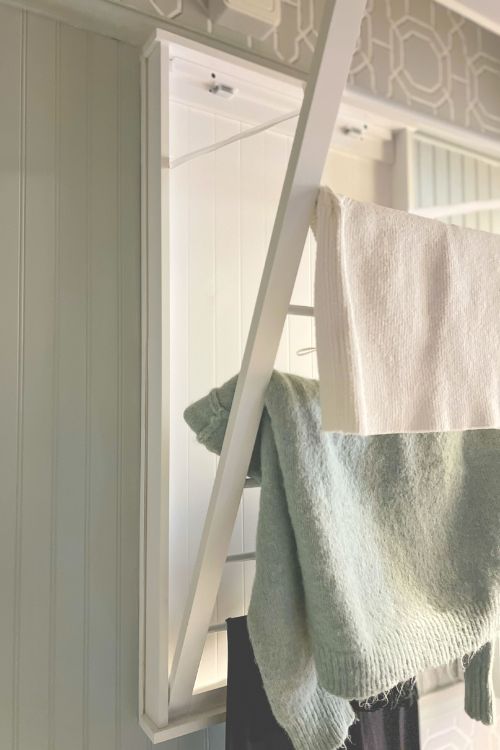
Hanging clothing on a wooden drying rack in a softly lit room with patterned wallpaper.
A white wooden display cabinet with multiple horizontal shelves, set against a light-colored wall with a decorative pattern.
A partially open white wooden door or panel revealing a hidden compartment with a small latch, set against a light-colored wall with beadboard paneling.

This ended up being one of those small projects that made a bigger difference than I expected. The breaker box is still easy to access, but now it actually looks like it belongs in the room instead of something I was trying to ignore. If you have one in an awkward spot too, this is an easy and affordable way to clean it up without any major work.

Everything I used in my Laundry Room Renovation


Latest Projects

Check Out My Latest Home Makeovers and DIY Transformations

More Ideas

If you’ve got more time for home improvement ideas check out these projects.
Something went wrong. Please refresh the page and/or try again.

Leave a Reply

Your email address will not be published. Required fields are marked *