
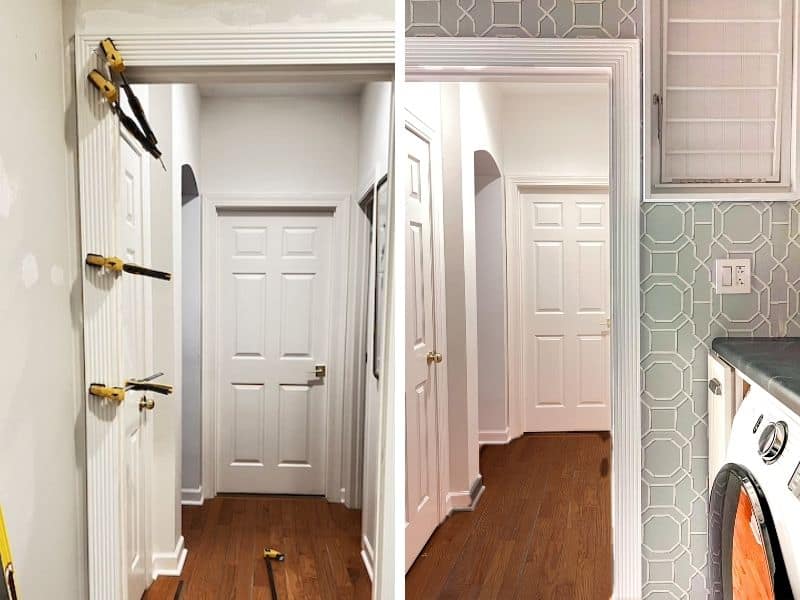
Why I Had to Replace the Door Trim
When working with a small space like a narrow laundry room, every inch matters. I thought I had everything figured out. I built a custom pull-out cabinet to maximize storage, which was almost perfect. But when I went to open it, the door didn’t clear the new trim. The interior door casing was original to the house and the trim was too thick.
Check out our laundry room journey here.


Before & After
LAUNDRY ROOM RENOVATION
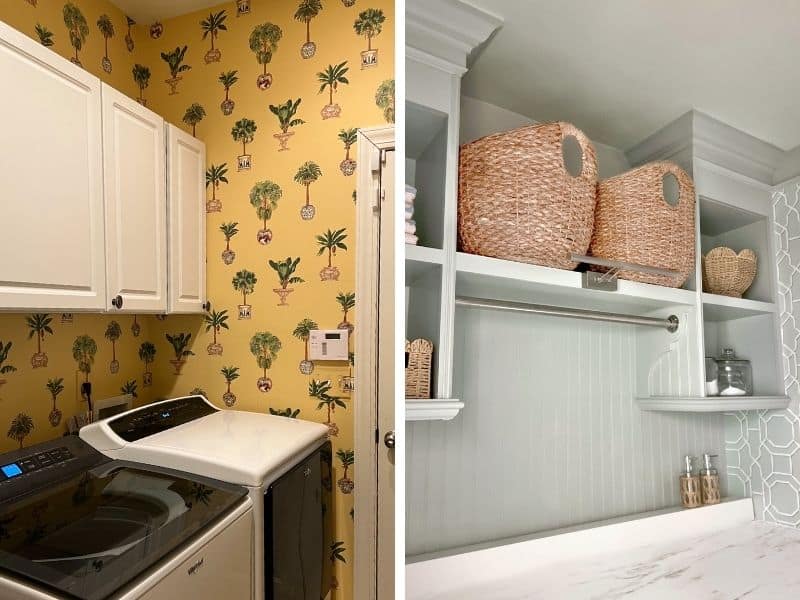

Laundry Room Projects
If you’re laundry room is too narrow, or you’re lacking space anywhere I have some creative fixes to maximize space in this hard-working room.


Cue the frustration. I didn’t want to give up my storage solution or live with a drawer that wouldn’t open. The standard 11/16-inch trim was too thick, so I needed something slimmer. After some hunting, I found the perfect solution: fluted door trim molding from Home Depot. It’s only 15/32 of an inch thick—just enough clearance for the cabinet to open without issues.
Why This Fluted Interior Door Casing Was the Best Choice
This trim wasn’t just skinny — it was pretty. It made the whole space feel updated, but now I want to change all the door casings. The cabinet now opens fine, but let’s be real — it’s tight. Every summer I’m gonna be over here holding my breath, hoping the wood cabinet doesn’t swell up on me.
How I Installed the Door Trim

Step 1: Measure Twice, Cut Once

Step 2: Test before you commit

Step 3: Line up the miter and secure with a clamp

Step 4: Attach with glue and nails
Time needed: 2 hours
Install Interior Door Casing For Tight Spots
- Measure Twice, Cut Once
When space is this tight, you can’t eyeball it. I measured the door frame and the pull-out cabinet clearance about five times before cutting the trim. Better safe than sorry.
- Test Before You Commit
Before attaching anything, I did a dry fit to make sure everything lined up and the drawer didn’t hit. If it hadn’t worked, I’d have been back to square one.
- Line up the miter and secure with a clamp
Before you attach anything for good, use clamps to hold the mitered corners in place. This lets you line them up perfectly and make sure the angles actually match.
- Add the Finishing Touches
I used a brad nailer and adhesive to install the trim. It was quick and easy, and the trim felt secure right away. See the tools I used at the bottom of the page
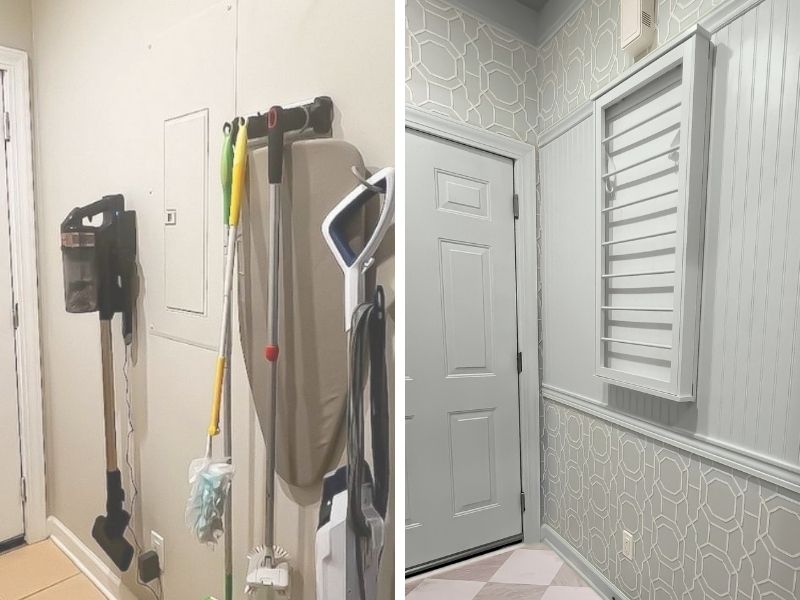
Lessons from Working in a Tiny Space
How to Keep Trim from Fighting Your Cabinets
If you’re working in a small space (like my narrow laundry room), here’s what I wish I knew before I started:
Double-check measurements before cutting or buying materials.

Always do a test fit before nailing anything down.

Humidity can also cause materials to expand or contract. If you’re worried about this, use materials made for high-moisture areas, like primed MDF.
How It Changed My Laundry Room
This little upgrade made a big difference. My pull-out cabinet finally opens the way it should, and the fluted trim adds just enough detail to make the space feel finished. It solved that annoying “why won’t my cabinet open all the way?” problem and still looks good doing it.
If your cabinet door is hitting trim, your baseboard is blocking a cabinet, or your trim feels too thick for a tight space, don’t just force it and hope for the best. Small rooms need smarter choices.

Latest Projects
Check Out My Latest Home Makeovers and DIY Transformations
More Ideas
If you’ve got more time for home improvement ideas check out these projects.


Something went wrong. Please refresh the page and/or try again.


