If you’re here, you’re probably dealing with the same problem. Googling things like how to fill grooves in a dining table? How to fill gaps between table planks? How to stop crumbs from getting stuck in table?
I decided to fix the problem by filling in the grooves on my dining table to create a smooth, wipeable surface. It turned out to be a pretty simple DIY project and made a huge difference in how easy the table is to clean.


Disclaimer: This page may contain affiliate links. If you click on one of these links and make a purchase, I may receive a small commission at no extra cost to you. I only recommend products and services that I believe will add value to my readers. See our full Affiliate Disclosure at this link.
Options for Filling Tabletop Grooves
Before starting, I looked into a few different ways people solve this problem.
One option is bar-top epoxy, which creates a thick glass-like surface over the entire table. This completely eliminates the grooves, but it also changes the look of the wood and can feel more like a bar top than a dining table. The easiest DIY method is filling the grooves with wood filler or Bondo, sanding it smooth, and refinishing the surface.
Why I Didn’t Use Regular Wood Filler
A lot of tutorials recommend filling tabletop grooves with standard wood filler. The problem is that most fillers, shrink as they dry, crack, and aren’t durable enough for heavy-use surfaces like dining tables.
I wanted something stronger that wouldn’t need to be redone later.
WoodEpox is a two-part epoxy filler that:
- doesn’t shrink
- bonds permanently to wood
- sands easily once cured
- can be stained or painted
Materials I Used
- WoodEpox two-part epoxy wood filler
- Putty knife
- Orbital sander
- Primer and paint (you can even stain this epoxy)

After years of trial and error (and too many paint disasters to count), I’ve finally nailed down the must-have painting supplies that actually make the job easier
How to Fix a Table That Traps Crumbs
Clean the Grooves
Before filling anything, I made sure the grooves were completely clean. Old crumbs, grease, or dust can cause the filler to lift later on, so I vacuumed the cracks and wiped everything down with a watered-down isopropyl alcohol.
Mix the WoodEpox
WoodEpox comes as a two-part putty. You scoop equal amounts of each part and knead them together until the color becomes uniform. Once mixed, you have about 20–30 minutes of working time before it starts to harden.

Apply The Epoxy
Using a putty knife, I pressed the epoxy putty firmly into the grooves. The key is to slightly overfill the groove, so once everything cures you can sand it perfectly flush with the tabletop. Because the epoxy has a clay-like consistency, it was actually easier to control than regular filler.

Sand the Table Smooth
It needs to cure for at least 24 hours. After the epoxy cured completely, I sanded the tabletop until the filled grooves were perfectly level with the surface. I started with 100 grit and moved up to 320.

This is the step that makes the biggest difference—once sanded smooth, the tabletop looks like one continuous surface instead of separate planks.

Refinish the Table
After sanding, you can refinish the table however you want. Depending on the look you’re going for, you can paint or even stain over this. I chose to paint because the base was white. I used an oil-based enamel since this table gets a lot of use and I wanted it cure to a hard finish without the risk of chipping.

The Result: No More Crumb Catchers


The biggest improvement is how easy the table is to clean now. Instead of crumbs getting trapped in grooves, the entire surface feels clean.
If you have a table with deep V-grooves that trap crumbs, filling them is a simple fix that makes the table way more practical for everyday use.

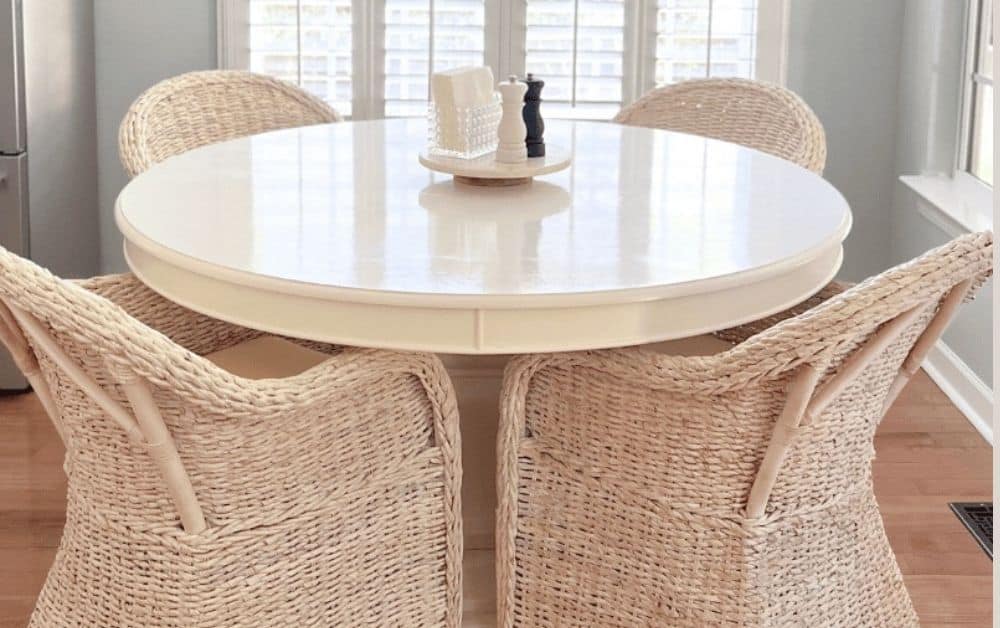
What’s on My Table Right Now
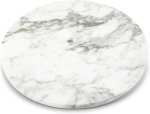
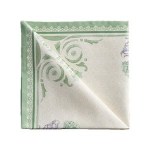
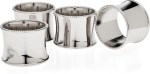
I was searching for these wicker dining chairs forever and they’re perfect. The marble lazy Susan holds our salt and pepper shakers (which I switch out seasonally), but these are my in-between holiday set. I like using chargers to help catch crumbs and spills. We switched to fabric napkins, so these napkin rings make it pretty. This flatware was from our wedding registry, and it gets used daily not just for holidays. And these La Rochere tumblers are sentimental, we bought them on my birthday in Paris.


Furniture Fixes & Makeovers
From restoring old furniture to simple upgrades that give pieces a new life.


