Home / All Posts / Projects / Staining With Gel Stain: How I Refinished a Wood Desk

Staining with gel stain is one of the easiest ways to take an old, worn piece of furniture and make it look like an expensive antique instead of a bad Goodwill find.

The beauty of older furniture is that, for the most part, it was built better than a lot of what you can buy today. The downside comes when you want to refinish it. For starters, all those detailed moldings and trims can make sanding impossible. And unlike new furniture, you can’t just check the product description to find out exactly what the piece is made from.
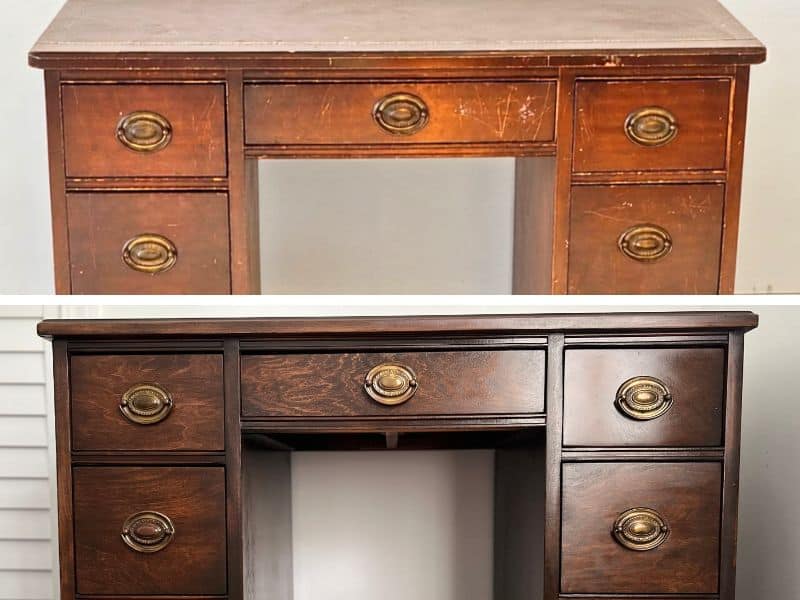
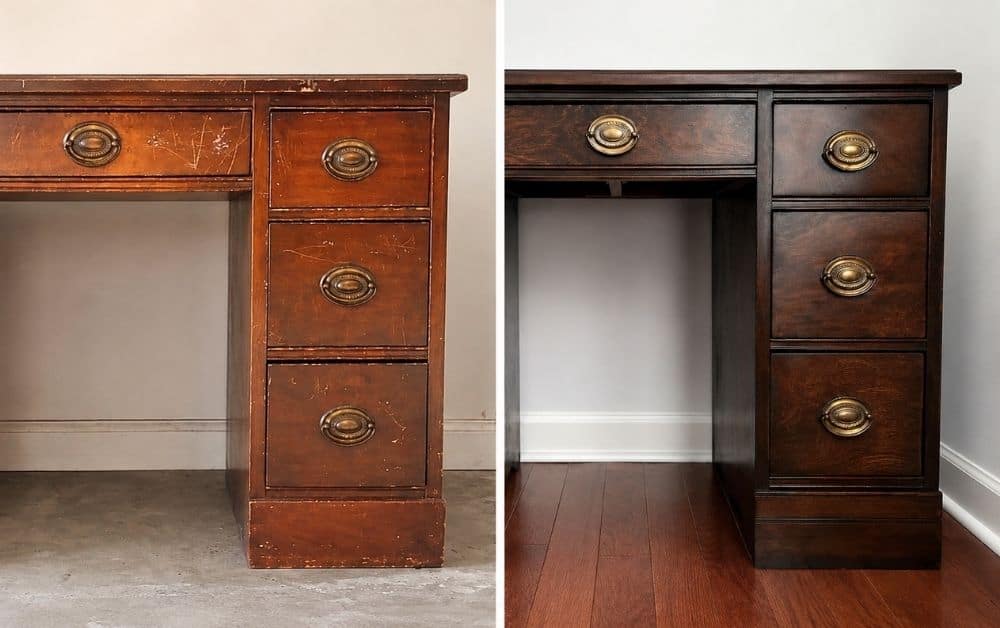
Wood desk before and after refinishing with gel stain
The before and after says it all. This desk had seen better days.

And that’s where gel stain really shines. You’re not playing the guessing game of wondering if pine will turn splotchy or maple will end up streaky. Penetrating stains can also make repairs and sanding mistakes stand out, especially on veneer where the stain can get darker along the edges or where you’ve sanded through the finish.

Disclaimer: This page may contain affiliate links. If you click on one of these links and make a purchase, I may receive a small commission at no extra cost to you. I only recommend products and services that I believe will add value to my readers. See our full Affiliate Disclosure at this link.
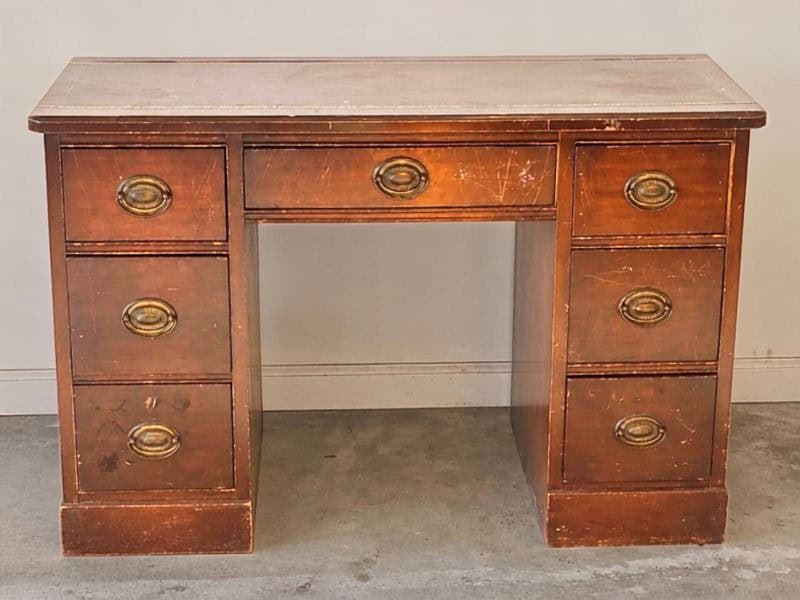
Wood desk before refinishing
The original wood desk before its refinishing makeover.
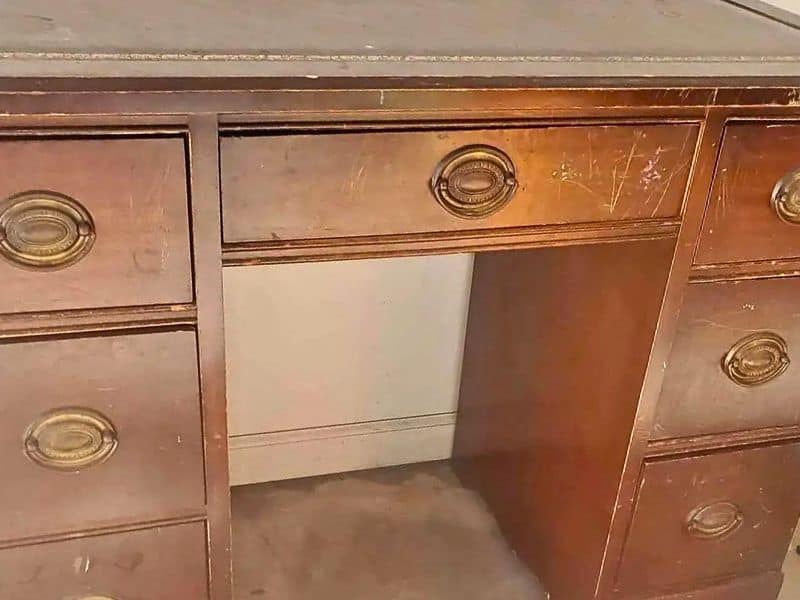
Scratches on wood desk before refinishing
The desk was covered in scratches and worn spots

Gel stain is semi-transparent, so you still get the character and grain of the wood without covering it up like paint would. Because it sits on top of the wood instead of soaking deep into the pores, I find the results much more predictable…

vintage and antique pedestal desks
And when you see what similar vintage and antique pedestal desks are selling for, it makes a little more sense why I didn’t want to toss mine. This three-piece pedestal desk is currently listed for $1,000 on Chairish, while a Victorian pedestal desk from around 1880 is listed for more than $3,000 on 1stDibs

This desk was the perfect size for a narrow, blank wall in my son’s room, and I loved its traditional shape and original brass hardware. Replacing it would have been easier, but finding another piece with that much character and the exact same size is nearly impossible. So, I just patched up the bad spots and used gel stain to bring the mismatched wood tones back together.


Why I Chose Gel Stain

I used Varathane Semi-Transparent Gel Stain in Kona, a deep brown that helped disguise the imperfections without hiding the wood grain. Traditional stain soaks into bare wood. Gel stain is thicker and sits closer to the surface, which gives you more control over the color. That made it a good fit for this desk because I was working with a mix of repaired veneer, sanded wood and areas where the original finish had absorbed unevenly.

Apply gel stain when temperatures are between 50-90°F and the humidity is less than 85%. I learned the hard way that this is very important.

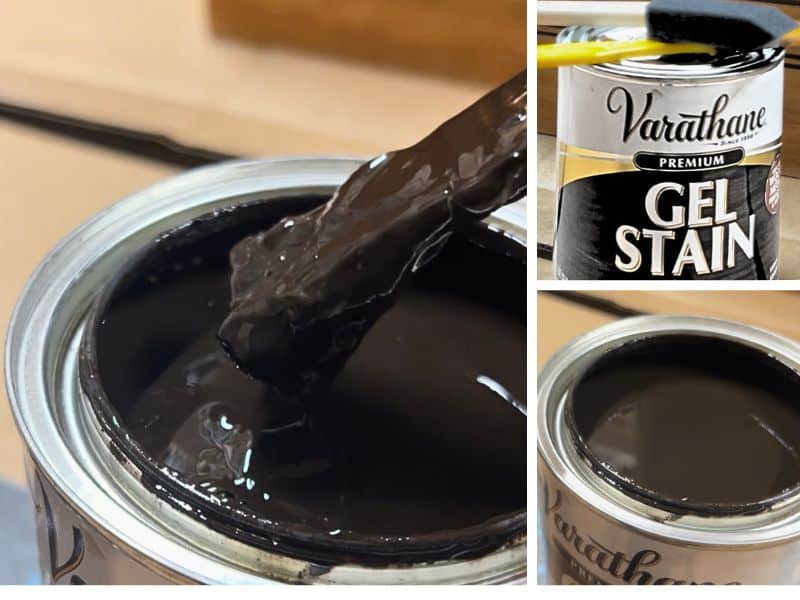
Varathane Premium Gel Stain in Kona
I used Varathane Premium Gel Stain in Kona for this desk. Gel stain is thicker than traditional stain, so it’s easier to control and works especially well when you’re staining over an existing finish or working with wood that doesn’t absorb stain evenly.

What I Used to Refinish the Desk

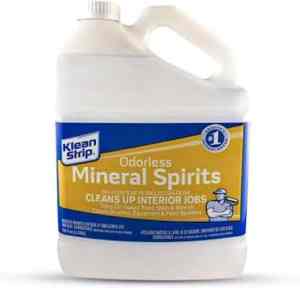
These are the exact products I used. I linked the Amazon listings for convenience, but most of them are also available at Lowe’s or Home Depot: Klean-Strip Odorless Mineral Spirits, Minwax Pre-Stain Wood Conditioner, Varathane Semi-Transparent Gel Stain in Kona, Varathane Oil-Based Ultimate Polyurethane in Gloss, Rejuvenate Exact Match Wood Repair Markers

I also used an orbital sander, sandpaper, Bondo (*see notes) for the larger damaged areas, lint-free cloths, a tack cloth, nitrile gloves and several disposable foam brushes.

Sanding Tools: A Guide for DIY Projects

Sanding is definitely not the most exciting part of a DIY project, but it’s one of the most important if you want things to look polished and professional. In this post, I’m sharing the sanding tools I actually use—whether you’re just getting started or looking to upgrade. From power sanders to sanding sponges, I’ve got…

Keep reading

How I Repaired & Stained the Desk with
Gel Stain

Brush options for applying gel stain to wood
A paint brush, chip brush, or foam brush can be used to apply gel stain.

1. Remove the hardware and clean the desk

I began by removing every drawer pull, this made it easier to clean and sand around the drawer fronts. It also kept stain and polyurethane from collecting around the hardware.

Next, I wiped the desk down with odorless mineral spirits to remove grease, grime and old surface residue.

I use mineral spirits with oil-based products, but the surface must be completely dry before moving on. I worked in an open garage, wore gloves(follow the safety directions on the container).

Removing hardware from a wood desk before refinishing
First things first: I removed all the hardware before cleaning, sanding, and staining the desk.

2. Repair the damaged veneer and deep gouges

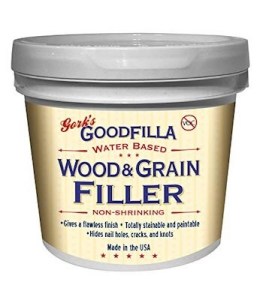
Some of the damage to the veneer was too deep to disappear with stain. I filled the larger gouges and loose or missing veneer with Bondo, allowed it to cure and sanded the repairs.

Wood Filler Options for Gel Stains

3. Sand the scratches without cutting through the veneer

The desk had enough deep scratches that I used an orbital sander on the flat areas, like the drawer fronts. On detailed edges and smaller areas, I sanded by hand . After sanding, I removed the dust with mineral spirits.

Veneer is thin, so don’t over-sand it. You can easily sand through the veneer and create a much bigger repair


Not sure which sandpaper grit to use? My free Sandpaper Grit Chart explains which grits remove an old finish, smooth repairs and prepare wood for stain without doing more damage than necessary.


Sanding a wood desk drawer before staining
Sanding the drawer removed the existing scratched and uneven finish before the gel stain

4. Applying wood conditioner

If you sand all the way down to bare wood, use a wood conditioner before staining. I only had small areas of bare wood on this desk, so I followed the conditioner directions on those areas.

Varathane instructions: “Soft woods such as pine, fir and maple require a wood conditioner.”

Applying wood conditioner before staining wood
Wood conditioner being applied before staining.

5. Stir the gel stain slowly

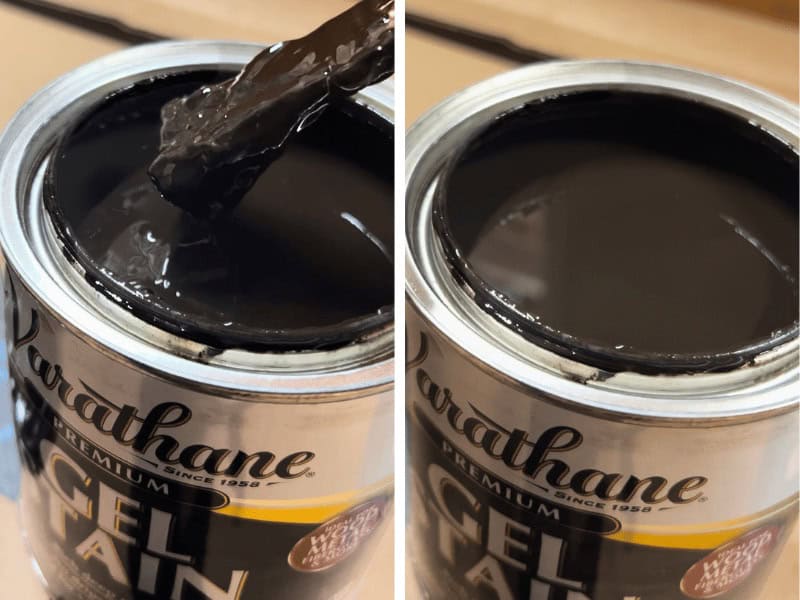
Gel stain is much thicker than penetrating wood stain. The pigment settles on the bottom of the can, so I slowly stirred it until everything was mixed back in.

Don’t shake the can of gel stain. Because it’s so thick, stirring is a better way to work the settled pigment back into the stain without adding air bubbles.

Stirring thick Varathane gel stain before applying it to wood
Gel stain is thick, so I slowly stirred it to mix everything back together before applying it.

6. Apply the gel stain and wipe away the excess

I experimented with a cloth, a chip brush and a foam brush. A foam brush gave me the least amount of streaks. I worked in small sections, brushed the stain with the grain, and wiped off the excess after about 2–5 minutes with a clean cloth.

The longer the stain sits before it is wiped, the darker the color can become.

If you get a dark or uneven spot, use a cloth dipped in mineral spirits to lift and blend the gel stain while it’s still workable.

Wiping excess gel stain from a wood desk
After letting the gel stain sit for a few minutes, I wiped off the excess.

7. Add another coat for deeper color

I allowed the first coat to dry overnight, but you only need to wait 2 hours. A second thin coat deepened the stain color into a rich, almost espresso-brown color and helped even out the old finish.

Don’t assume every gel stain dries at the same rate. Varathane says you can recoat after 2 hours, while other gel stains may need much longer. Dry and recoat times can change with temperature and humidity. Check the directions on the can you’re using, especially when staining over an existing finish.

8. Protect the finish with oil-based polyurethane

Once the gel stain was fully dry, I used Varathane Oil-Based Ultimate Polyurethane in gloss. Kona has a cooler undertone, so even with the amber tint from the oil-based polyurethane, I still really liked the color.

Varathane oil-based and water-based polyurethane options for interior and exterior projects
These are the Varathane finishes to use on top of stained projects.

I used this Wooster white china brush to apply the finish, always use a natural-bristle brush for oil-based polyurethane or any oil-based paint. I would not use a paint roller on this type of project because the air trapped in a foam roller can cause bubbles in the finish.

After the first coat dried, I lightly scuff-sanded the surface with 320-grit sandpaper and removed the new dust with a tack cloth. I applied 3 coats.

Don’t wipe polyurethane with mineral spirits between coats. If the finish hasn’t fully cured, mineral spirits can soften or dissolve it.

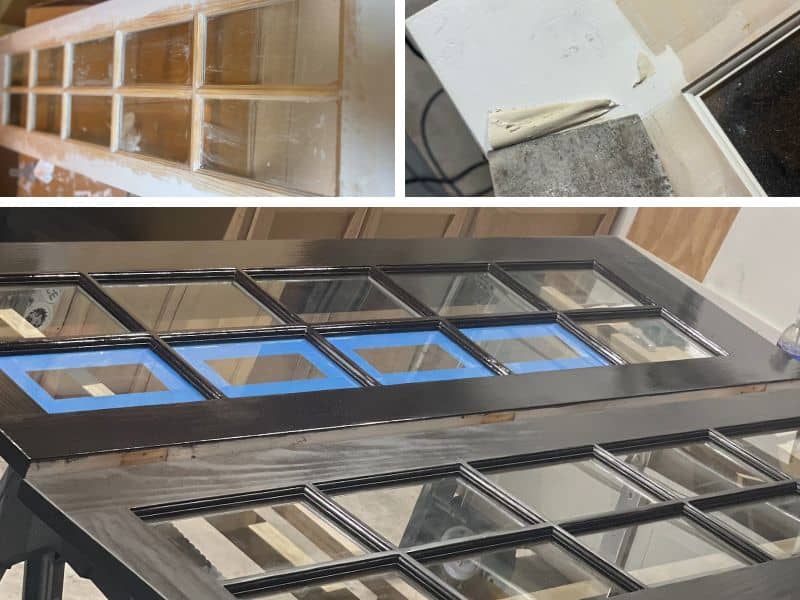
Applying gel stain to wood French doors
Gel stain isn’t just for furniture. I’ve also used it to update wood French doors. The bottom image shows the doors the difference polyurethane makes on top of the gel stain.

This is the part that takes patience. Give the polyurethane 24 hours before light use and about 3 days before putting the desk back into everyday use. It’s tempting to rush it, but the finish needs time to fully harden.


The Finished Desk

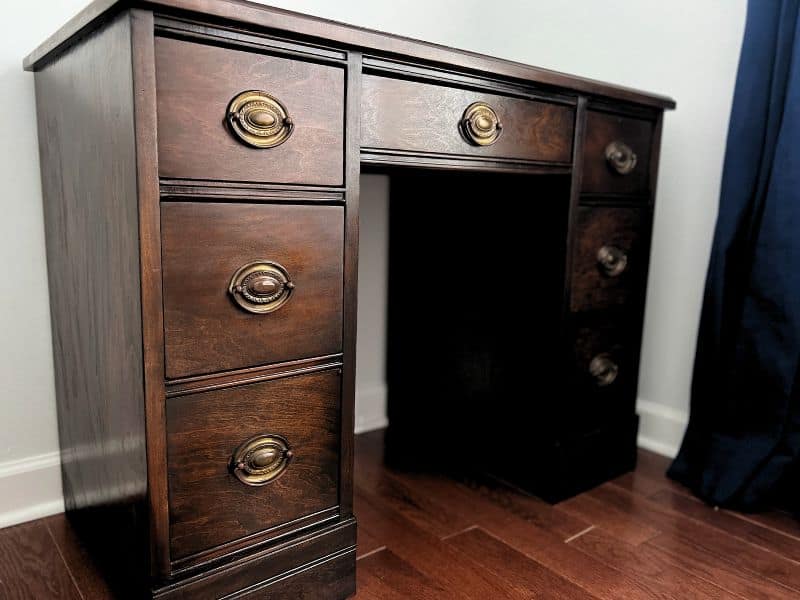
The gel stain did exactly what I hoped it would. It helped blend all those mismatched wood tones, covered some of the superficial scratches. And it gave the desk a much richer color without completely covering up the character of the piece, I think the beautiful wood grain is actually more prominent now. 

And for $50, I’m pretty happy with how it turned out. Finding another desk that fit that narrow wall would have been a lot harder than fixing this one up.

Refinished wood desk with a rich gel stain finish
The finished desk after staining with Varathane gel stain in Kona.
Side view of a refinished wood desk with gel stain
A side view of the finished desk showing slightly amber color the finish gave to this stain color.

How I Handle New Scratches

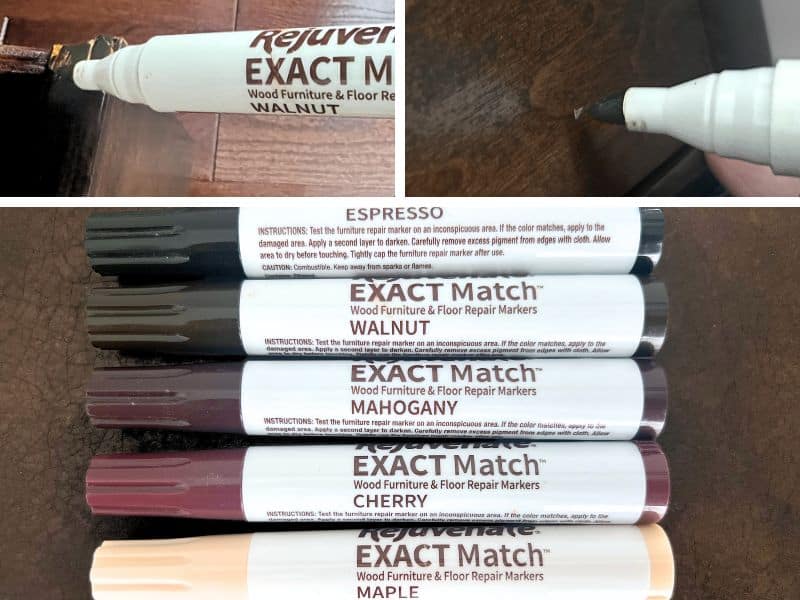
It’s my son’s desk, so it’s going to get used. I wanted it to look good and hold up to everyday life, but I also don’t expect it to stay perfect. For faint marks in the clear finish, I start with Howard Feed-N-Wax. If a scratch goes through the finish and exposes the lighter wood underneath, I use a Rejuvenate repair marker just on the damaged spot. I save Restor-A-Finish for bigger restoration projects since it affects the whole surface. You can see how I use it in my antique vanity restoration tutorial.

Using wood repair markers to touch up furniture
For the little scratches that show up later, wood repair markers make quick touch-ups easy.

Things to Know Before

FAQ: Staining with Gel Stain

Refinished wood desk with gray ottoman
The refinished desk paired with a narrow ottoman instead of desk chair

Do I need to test gel stain before using it?

Yes. If you’re using a wood conditioner, gel stain, and topcoat, test the whole combination on a hidden area first. It’s much easier to change your plan there than on the front of the furniture.

Can I use pre-stain wood conditioner over an existing finish?

No. Pre-stain conditioner is meant for bare wood. If you’re staining over an intact finish, follow the gel stain directions for preparing the existing surface instead.

How do you apply gel stain without getting it too thick?

Work in small sections and wipe off the excess before the gel stain gets tacky. This makes it much easier to control the color and avoid uneven spots.

How many foam brushes do I need for gel stain?

Have extras. Foam brushes can start to soften and fall apart while you’re working, especially with thicker gel stain. You’ll also want plenty of clean, lint-free cloths for wiping off the excess.

How do you safely dispose of rags used with oil-based stain and polyurethane?

Follow the fire-safety directions on your specific products. Oil-soaked rags can be a fire hazard, so don’t just toss them in the trash while they’re still wet.

Can you sand veneer before applying gel stain?

Yes, but be careful. Veneer is very thin, so only sand enough to smooth the damaged area or prepare the existing finish. Trying to sand out every scratch can take you right through the veneer.

How long should gel stain and polyurethane dry before recoating?

Follow the drying and recoating times on your specific products. Different products have different formulas and drying times, and temperature and humidity can affect how quickly they dry.


Was It Worth Refinishing?

Yes. Was this the quickest furniture makeover? Definitely not. But for $50 plus supplies, I ended up with a desk that fits the room, works the way I need it to, and looks so much better. The gel stain helped blend the repairs and mismatched wood tones, and the polyurethane gave it a finish that can handle being used every day.

If you are deciding whether to refinish an imperfect wood desk, look past the scratches first. Check whether it is sturdy, whether the drawers work and whether the size is difficult to replace. Cosmetic damage can usually be repaired (or masked). Finding another piece with the same character and proportions is usually harder.

Wood desk before and after refinishing with gel stain
The before and after says it all. This desk had seen better days.


Latest Projects

Check Out My Latest Home Makeovers and DIY Transformations

Leave a Reply

Your email address will not be published. Required fields are marked *

I’m Bailey

On Maple Lane logo – black outline graphic of a traditional Southern home with a transparent background

I share renovation projects and smaller DIY’s for real homes. Practical, budget-friendly upgrades and step-by-step projects you can actually do yourself.

I hope you find ideas you love, projects you can actually use, and a little inspiration along the way—no matter your style or budget.

recent popular posts

new finds

Project Sources

tiktok https://www.tiktok.com/@onmaplelane

Shop the exact products used in my home and DIY projects.

Let’s connect

Special Offers From Our Affiliate Partners


two pages logo coupon code ONMAPLELANE
exclusive coupon code
ONMAPLELANE
for 22% off
design shop coupon code
DesignShop
Get 2 FREE samples when you sign up here.
vevor coupon code
VEVOR.com
Exclusive Extra 15% Discount for VEVOR US Top Picks
coupon code: VVUSTO
hychika coupon code
hychika coupon code
serwall coupon code
serwall outdoor coupon offers
Serwall Outdoor
coupon code
GOSUMMER
for $50 + 6% off
OUTLET15
Extra 15% Off Selected Clearance Products
ruggable coupon code
Labor Day Sale! Save up to 30% Off
Morris & Co. Sanderson, Mrs. Alice, Scalamandré 
samplize coupon code
Samplize Peel and Stick Paint Samples
20% off orders $45+
Code LDW20
Home / All Posts / Projects / Staining With Gel Stain: How I Refinished a Wood Desk

Staining with gel stain is one of the easiest ways to take an old, worn piece of furniture and make it look like an expensive antique instead of a bad Goodwill find.

The beauty of older furniture is that, for the most part, it was built better than a lot of what you can buy today. The downside comes when you want to refinish it. For starters, all those detailed moldings and trims can make sanding impossible. And unlike new furniture, you can’t just check the product description to find out exactly what the piece is made from.

Wood desk before and after refinishing with gel stain
The before and after says it all. This desk had seen better days.

And that’s where gel stain really shines. You’re not playing the guessing game of wondering if pine will turn splotchy or maple will end up streaky. Penetrating stains can also make repairs and sanding mistakes stand out, especially on veneer where the stain can get darker along the edges or where you’ve sanded through the finish.

Disclaimer: This page may contain affiliate links. If you click on one of these links and make a purchase, I may receive a small commission at no extra cost to you. I only recommend products and services that I believe will add value to my readers. See our full Affiliate Disclosure at this link.
Wood desk before refinishing
The original wood desk before its refinishing makeover.
Scratches on wood desk before refinishing
The desk was covered in scratches and worn spots

Gel stain is semi-transparent, so you still get the character and grain of the wood without covering it up like paint would. Because it sits on top of the wood instead of soaking deep into the pores, I find the results much more predictable…

vintage and antique pedestal desks
And when you see what similar vintage and antique pedestal desks are selling for, it makes a little more sense why I didn’t want to toss mine. This three-piece pedestal desk is currently listed for $1,000 on Chairish, while a Victorian pedestal desk from around 1880 is listed for more than $3,000 on 1stDibs

This desk was the perfect size for a narrow, blank wall in my son’s room, and I loved its traditional shape and original brass hardware. Replacing it would have been easier, but finding another piece with that much character and the exact same size is nearly impossible. So, I just patched up the bad spots and used gel stain to bring the mismatched wood tones back together.


Why I Chose Gel Stain

I used Varathane Semi-Transparent Gel Stain in Kona, a deep brown that helped disguise the imperfections without hiding the wood grain. Traditional stain soaks into bare wood. Gel stain is thicker and sits closer to the surface, which gives you more control over the color. That made it a good fit for this desk because I was working with a mix of repaired veneer, sanded wood and areas where the original finish had absorbed unevenly.

Apply gel stain when temperatures are between 50-90°F and the humidity is less than 85%. I learned the hard way that this is very important.
Varathane Premium Gel Stain in Kona
I used Varathane Premium Gel Stain in Kona for this desk. Gel stain is thicker than traditional stain, so it’s easier to control and works especially well when you’re staining over an existing finish or working with wood that doesn’t absorb stain evenly.

What I Used to Refinish the Desk

These are the exact products I used. I linked the Amazon listings for convenience, but most of them are also available at Lowe’s or Home Depot: Klean-Strip Odorless Mineral Spirits, Minwax Pre-Stain Wood Conditioner, Varathane Semi-Transparent Gel Stain in Kona, Varathane Oil-Based Ultimate Polyurethane in Gloss, Rejuvenate Exact Match Wood Repair Markers
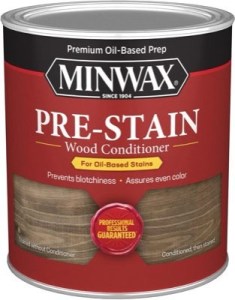
I also used an orbital sander, sandpaper, Bondo (*see notes) for the larger damaged areas, lint-free cloths, a tack cloth, nitrile gloves and several disposable foam brushes.

Sanding Tools: A Guide for DIY Projects

Sanding is definitely not the most exciting part of a DIY project, but it’s one of the most important if you want things to look polished and professional. In this post, I’m sharing the sanding tools I actually use—whether you’re just getting started or looking to upgrade. From power sanders to sanding sponges, I’ve got…

Keep reading

How I Repaired & Stained the Desk with
Gel Stain
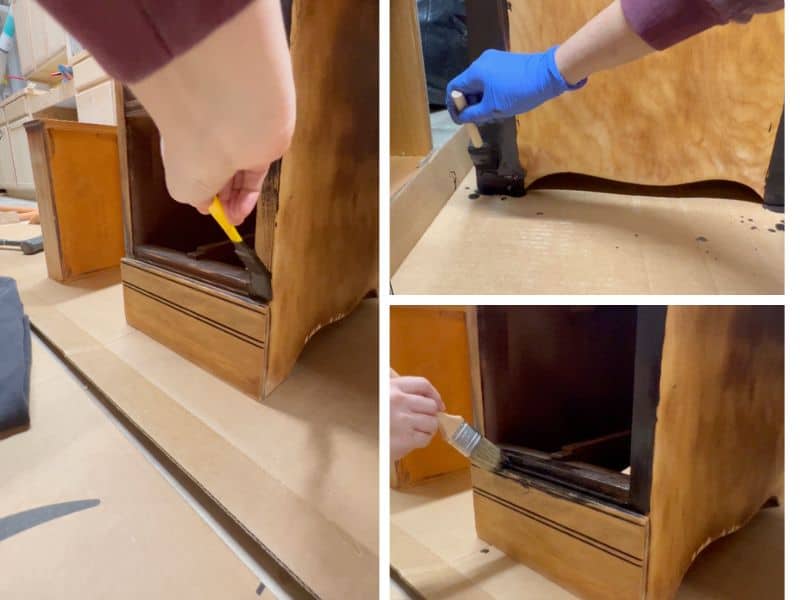
Brush options for applying gel stain to wood
A paint brush, chip brush, or foam brush can be used to apply gel stain.

1. Remove the hardware and clean the desk

I began by removing every drawer pull, this made it easier to clean and sand around the drawer fronts. It also kept stain and polyurethane from collecting around the hardware.

Next, I wiped the desk down with odorless mineral spirits to remove grease, grime and old surface residue.

I use mineral spirits with oil-based products, but the surface must be completely dry before moving on. I worked in an open garage, wore gloves(follow the safety directions on the container).
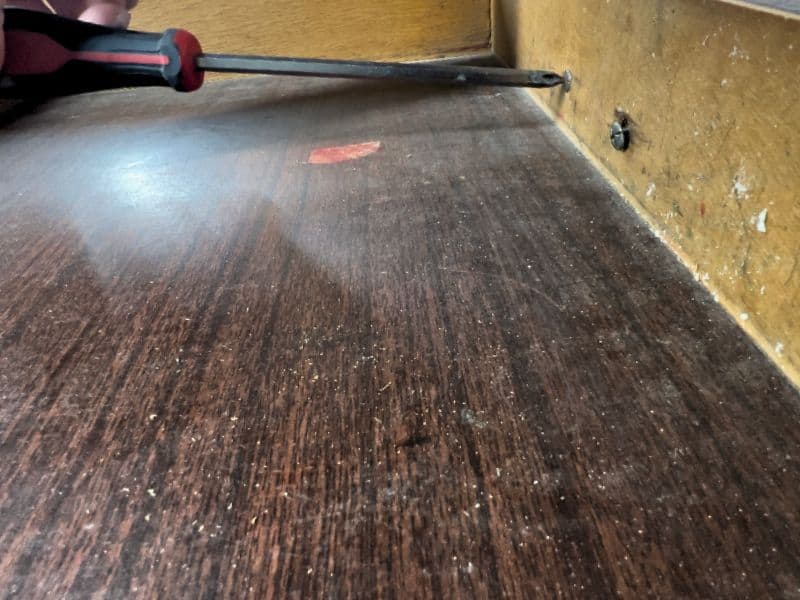
Removing hardware from a wood desk before refinishing
First things first: I removed all the hardware before cleaning, sanding, and staining the desk.

2. Repair the damaged veneer and deep gouges

Some of the damage to the veneer was too deep to disappear with stain. I filled the larger gouges and loose or missing veneer with Bondo, allowed it to cure and sanded the repairs.

Wood Filler Options for Gel Stains

3. Sand the scratches without cutting through the veneer

The desk had enough deep scratches that I used an orbital sander on the flat areas, like the drawer fronts. On detailed edges and smaller areas, I sanded by hand . After sanding, I removed the dust with mineral spirits.

Veneer is thin, so don’t over-sand it. You can easily sand through the veneer and create a much bigger repair


Not sure which sandpaper grit to use? My free Sandpaper Grit Chart explains which grits remove an old finish, smooth repairs and prepare wood for stain without doing more damage than necessary.


Sanding a wood desk drawer before staining
Sanding the drawer removed the existing scratched and uneven finish before the gel stain

4. Applying wood conditioner

If you sand all the way down to bare wood, use a wood conditioner before staining. I only had small areas of bare wood on this desk, so I followed the conditioner directions on those areas.

Varathane instructions: “Soft woods such as pine, fir and maple require a wood conditioner.”
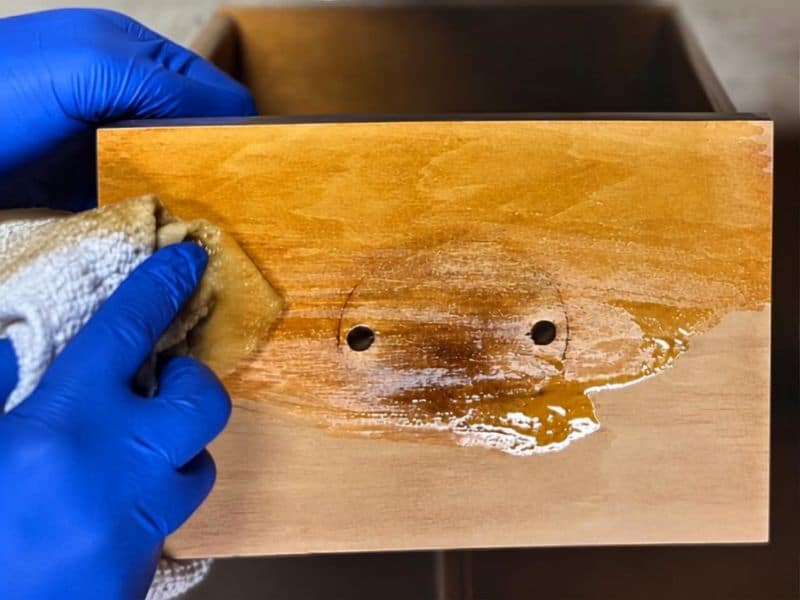
Applying wood conditioner before staining wood
Wood conditioner being applied before staining.

5. Stir the gel stain slowly

Gel stain is much thicker than penetrating wood stain. The pigment settles on the bottom of the can, so I slowly stirred it until everything was mixed back in.

Don’t shake the can of gel stain. Because it’s so thick, stirring is a better way to work the settled pigment back into the stain without adding air bubbles.
Stirring thick Varathane gel stain before applying it to wood
Gel stain is thick, so I slowly stirred it to mix everything back together before applying it.

6. Apply the gel stain and wipe away the excess

I experimented with a cloth, a chip brush and a foam brush. A foam brush gave me the least amount of streaks. I worked in small sections, brushed the stain with the grain, and wiped off the excess after about 2–5 minutes with a clean cloth.

The longer the stain sits before it is wiped, the darker the color can become.

If you get a dark or uneven spot, use a cloth dipped in mineral spirits to lift and blend the gel stain while it’s still workable.

Wiping excess gel stain from a wood desk
After letting the gel stain sit for a few minutes, I wiped off the excess.

7. Add another coat for deeper color

I allowed the first coat to dry overnight, but you only need to wait 2 hours. A second thin coat deepened the stain color into a rich, almost espresso-brown color and helped even out the old finish.

Don’t assume every gel stain dries at the same rate. Varathane says you can recoat after 2 hours, while other gel stains may need much longer. Dry and recoat times can change with temperature and humidity. Check the directions on the can you’re using, especially when staining over an existing finish.

8. Protect the finish with oil-based polyurethane

Once the gel stain was fully dry, I used Varathane Oil-Based Ultimate Polyurethane in gloss. Kona has a cooler undertone, so even with the amber tint from the oil-based polyurethane, I still really liked the color.

Varathane oil-based and water-based polyurethane options for interior and exterior projects
These are the Varathane finishes to use on top of stained projects.

I used this Wooster white china brush to apply the finish, always use a natural-bristle brush for oil-based polyurethane or any oil-based paint. I would not use a paint roller on this type of project because the air trapped in a foam roller can cause bubbles in the finish.

After the first coat dried, I lightly scuff-sanded the surface with 320-grit sandpaper and removed the new dust with a tack cloth. I applied 3 coats.

Don’t wipe polyurethane with mineral spirits between coats. If the finish hasn’t fully cured, mineral spirits can soften or dissolve it.
Applying gel stain to wood French doors
Gel stain isn’t just for furniture. I’ve also used it to update wood French doors. The bottom image shows the doors the difference polyurethane makes on top of the gel stain.

This is the part that takes patience. Give the polyurethane 24 hours before light use and about 3 days before putting the desk back into everyday use. It’s tempting to rush it, but the finish needs time to fully harden.


The Finished Desk

The gel stain did exactly what I hoped it would. It helped blend all those mismatched wood tones, covered some of the superficial scratches. And it gave the desk a much richer color without completely covering up the character of the piece, I think the beautiful wood grain is actually more prominent now. 

And for $50, I’m pretty happy with how it turned out. Finding another desk that fit that narrow wall would have been a lot harder than fixing this one up.

Refinished wood desk with a rich gel stain finish
The finished desk after staining with Varathane gel stain in Kona.
Side view of a refinished wood desk with gel stain
A side view of the finished desk showing slightly amber color the finish gave to this stain color.

How I Handle New Scratches

It’s my son’s desk, so it’s going to get used. I wanted it to look good and hold up to everyday life, but I also don’t expect it to stay perfect. For faint marks in the clear finish, I start with Howard Feed-N-Wax. If a scratch goes through the finish and exposes the lighter wood underneath, I use a Rejuvenate repair marker just on the damaged spot. I save Restor-A-Finish for bigger restoration projects since it affects the whole surface. You can see how I use it in my antique vanity restoration tutorial.
Using wood repair markers to touch up furniture
For the little scratches that show up later, wood repair markers make quick touch-ups easy.

Things to Know Before

FAQ: Staining with Gel Stain
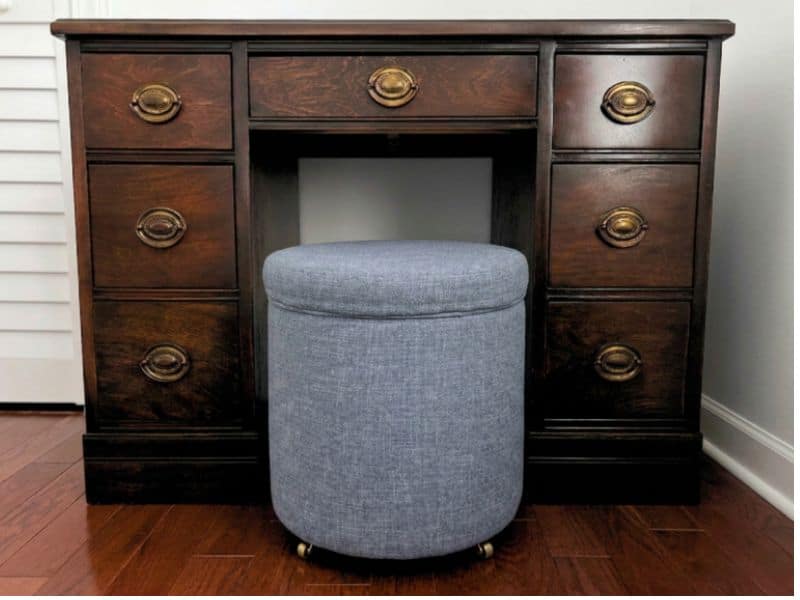
Refinished wood desk with gray ottoman
The refinished desk paired with a narrow ottoman instead of desk chair

Do I need to test gel stain before using it?

Yes. If you’re using a wood conditioner, gel stain, and topcoat, test the whole combination on a hidden area first. It’s much easier to change your plan there than on the front of the furniture.

Can I use pre-stain wood conditioner over an existing finish?

No. Pre-stain conditioner is meant for bare wood. If you’re staining over an intact finish, follow the gel stain directions for preparing the existing surface instead.

How do you apply gel stain without getting it too thick?

Work in small sections and wipe off the excess before the gel stain gets tacky. This makes it much easier to control the color and avoid uneven spots.

How many foam brushes do I need for gel stain?

Have extras. Foam brushes can start to soften and fall apart while you’re working, especially with thicker gel stain. You’ll also want plenty of clean, lint-free cloths for wiping off the excess.

How do you safely dispose of rags used with oil-based stain and polyurethane?

Follow the fire-safety directions on your specific products. Oil-soaked rags can be a fire hazard, so don’t just toss them in the trash while they’re still wet.

Can you sand veneer before applying gel stain?

Yes, but be careful. Veneer is very thin, so only sand enough to smooth the damaged area or prepare the existing finish. Trying to sand out every scratch can take you right through the veneer.

How long should gel stain and polyurethane dry before recoating?

Follow the drying and recoating times on your specific products. Different products have different formulas and drying times, and temperature and humidity can affect how quickly they dry.


Was It Worth Refinishing?

Yes. Was this the quickest furniture makeover? Definitely not. But for $50 plus supplies, I ended up with a desk that fits the room, works the way I need it to, and looks so much better. The gel stain helped blend the repairs and mismatched wood tones, and the polyurethane gave it a finish that can handle being used every day.

If you are deciding whether to refinish an imperfect wood desk, look past the scratches first. Check whether it is sturdy, whether the drawers work and whether the size is difficult to replace. Cosmetic damage can usually be repaired (or masked). Finding another piece with the same character and proportions is usually harder.

Wood desk before and after refinishing with gel stain
The before and after says it all. This desk had seen better days.

Leave a Reply

Your email address will not be published. Required fields are marked *