


How to Repair Outdoor Stairs: for deck stair repair and painting wood steps outside, the secret is in the prep, the primer, and the paint used. The best paint for outdoor wood steps? A porch-and-patio floor enamel (durable, low-luster, and built for foot traffic.)
Our porch was in rough shape. The outside wood stairs needed repair. When I first painted them two years ago with Cabot Deck Correct, I had high hopes it promised to fill cracks, lock down splinters, and resist dirt. But instead, the paint sank into the wood, didn’t cover imperfections, and was impossible to keep clean. The risers were still peeling, and every time I used the stairs, I cringed.

1. Why exterior stair paint fails (and what most people skip)
2. How to repair damaged wood before painting
3. What to use so it actually lasts outside

What I Used
Tools




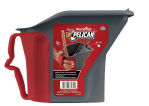

Materials


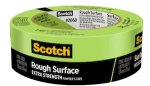
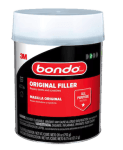

7 Steps To Repairing & Painting Your Stairs
3. Repairing Cracks and Holes In The Exterior Stair Risers
Outside Stair Repair
How to Repair Outdoor Stairs
1. Scraping Off the Old Paint

The first step was to remove the peeling paint from the surface. Using a paint scraper, I carefully scraped away the loose and flaky paint. Some areas were cracked, but not enough to come off with the paint scraper. It’s important to get as smooth a surface as possible, for the new paint to adhere properly. This tool helps scrape the paint off quickly, but works best with a new blade.
2. Sealing the Edges
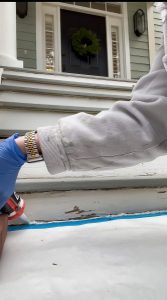
First I caulked the area where the wood met the concrete. It wasn’t easy to get a straight line of caulk, especially on the areas of wood that needed repair.
I should have saved this for the final step. Getting a straight line would have been easier to achieve and to prevent debris getting into the caulk before it dried. The bottom riser was really rough from moisture seeping in and causing the paint to peel.
3. Repairing Cracks and Holes In The Exterior Stair Risers
Next, I used Bondo All-Purpose Putty to fill in all the cracks. This product is excellent for filling and smoothing imperfections on wood and concrete. After the Bondo dried, I sanded it down for a seamless finish.

At first, I tried hand sanding with a sanding sponge, but it wasn’t effective. I switched to an orbital sander. I started with 60-grit sandpaper to smooth the rough areas. Then, I gradually worked up to 220-grit for a smooth finish, ready for paint.
Painting Guide
How to Repair Outdoor Stairs
4. Cleaning and Prepping the Area

After sanding, I vacuumed and wiped the steps with a wet rag to remove all dust. Don’t try this on a windy day.
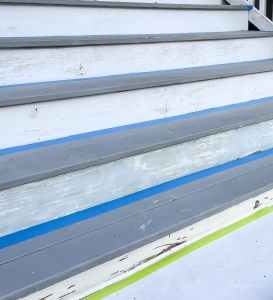
5. Taping Off the Treads
I wanted to paint the risers, banister, railings, columns, and front door trim white. So, I carefully taped off the gray stair treads to keep everything clean and crisp.
6. Priming the Surface
Finally up to Painting! I applied a coat of Kilz White Interior/Exterior Primer. After the first coat dried, I lightly sanded the surface to smooth out any imperfections before applying the second coat.

Why use KILZ Premium Primer on outdoor steps?
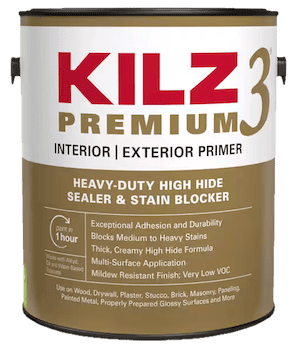
- Seals the surface — penetrates bare, repaired, or previously painted wood so the topcoat bonds properly instead of sinking in (which is exactly what happened with Cabot Deck Correct )
- Blocks stains — covers tannins and old paint bleed-through that would otherwise ghost through your new finish
- Interior/Exterior rated — formulated to handle outdoor conditions
- High-hide — especially useful over Bondo-filled repairs, which can look patchy without a solid primer coat first
7. Painting Exterior Stairs & Risers
For the final color, I used BEHR PREMIUM French Silver & Ultra Pure White Porch and Patio Floor Paint in a low-lustre finish. I applied the french silver to the stair treads and ultra pure white to the risers and trim. I applied two coats, which it needed to cover the areas I had repaired with Bondo.




If I was going to do it again, I would use a darker color or a tan. The gray was to color match the Deck Correct, because I didn’t want to paint the porch floor as well. I would highly recommend ordering samples from Samplize to choose a color (they now carry Behr!) Click ☞ here to get free overnight samples.
Final Reveal
How to Repair Outdoor Stairs
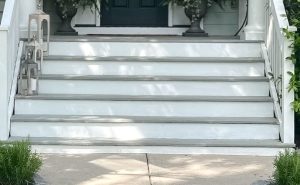
Swipe to see the transformation! Proof that a little elbow grease (and the right tools) can make a huge difference. Caulking where the wood meets the concrete After I applied Bondo Exterior stairs freshly painted with primer 
After: A fresh coat of paint and repaired wood gave these exterior stairs a brand-new look.


Why BEHR Porch & Patio Floor Paint is the best paint for outdoor wood steps:
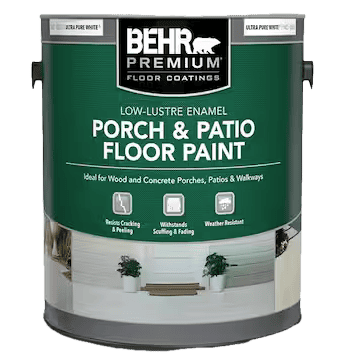
- Built for abuse — thicker formula resists scuffing, chipping, and peeling on surfaces people walk on constantly
- Weather resistant — handles UV, rain, and temperature swings without cracking or fading
- Dries hard — cures to a floor-grade finish, not a wall-paint finish that would wear through in one season
Tips for Painting Exterior Stairs
- Prep: Sanding, cleaning, and priming are the most important steps if you want a long-lasting finish.
- Priming & Painting : Invest in an quality products designed for wood steps and outdoor use.
- Seal: Don’t skip sealing gaps between the wood and walkway to protect against moisture damage.
- Be Patient: Allow each layer (primer and paint) to dry fully before applying the next, or you can risk it all peeling off.
How to Repair Outdoor Stairs
FAQ: How to fix damaged wooden stairs?
Inspect the steps closely for soft spots, discoloration, or crumbling areas. Use a screwdriver to gently press into the wood; if it sinks easily, the wood may be rotting.
No, painting over rotting wood won’t fix the issue. You need to remove the rotted sections. Then, fill the area with wood filler or epoxy. Alternatively, replace the wood entirely. This ensures structural integrity before painting.
For extensive rot, it’s best to replace the damaged boards entirely. If the rot has compromised the structure of the steps, consult a professional for repairs. Once replaced, seal the new wood properly before painting.
Seal gaps where the wood meets concrete to prevent moisture infiltration. Use a high-quality exterior primer and paint, and apply a water-resistant sealer to protect the wood from weather and humidity.
FAQ: What is the best way to paint wooden stairs?
Seal the painted steps with a clear topcoat, such as a polyurethane or polycrylic sealer designed for exterior use. This adds an extra layer of protection against dirt, stains, and weather.
The process typically takes 3–5 days, including prep work, drying time between coats of primer and paint, and applying a sealer. Plan for a long weekend to complete the project.
If the existing paint is in good condition, you can paint over it. However, if it’s peeling or cracking, it must be removed to create a smooth surface for the new paint to adhere properly.
Lessons Learned While Repainting My Front Porch Steps


Honestly, this whole process reminded me that a little extra effort can make a huge difference. It wasn’t the most glamorous weekend. At one point, I had dust in my hair, paint on my face, and Bondo under my nails. But I’m no longer cringing every time I walk up to my front door.
If you’re thinking about repainting your exterior steps, take it from me: do the prep work.

Latest Projects
Check Out My Latest Home Makeovers and DIY Transformations
More Ideas


Something went wrong. Please refresh the page and/or try again.
















Leave a Reply