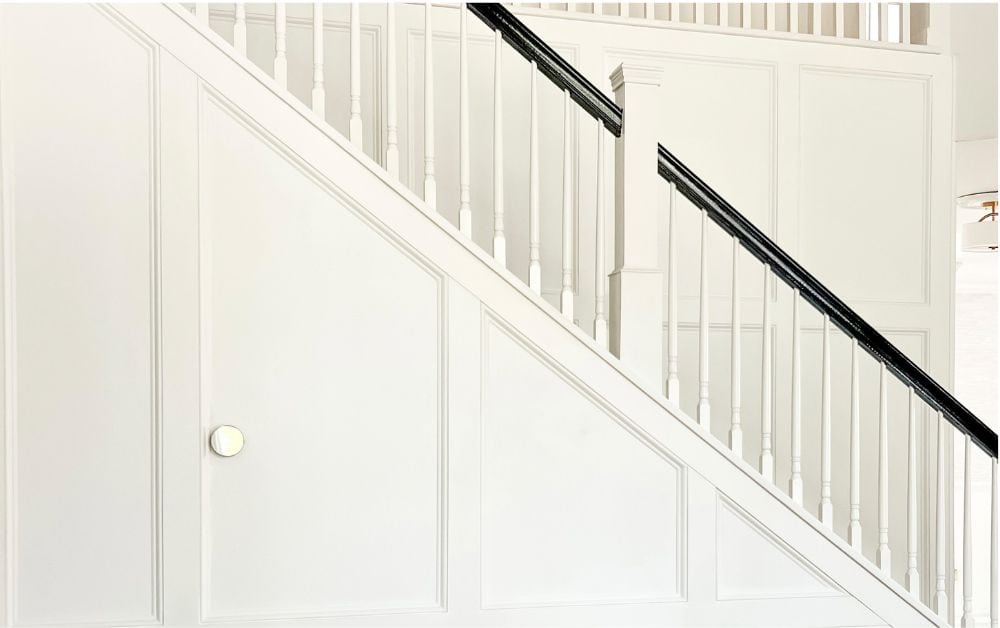
Installing wainscoting panels doesn’t have to be complicated or expensive. I gave my staircase makeover for about $600. The result is so perfect, we keep getting “Was that always there?” It blends perfectly with the rest of our home’s style, adding timeless charm and character.
Our plan was to create raised panel frames using primed boards and then add some decorative molding inside those frames. I’ll walk through how I measured everything, dealt with tricky spots (vents and outlets). Also, my tips for picking the right layout and how to visualize your molding design before you start.

Check out Part 1 if you want to update your treads or bannister

Staircase Renovation: Carpet to Wood
Want to update your staircase? Here is our staircase renovation guide to updating newel posts and swapping carpet for treads.
Disclaimer: This page may contain affiliate links. If you click on one of these links and make a purchase, I may receive a small commission at no extra cost to you. I only recommend products and services that I believe will add value to my readers. See our full Affiliate Disclosure at this link.


| Material | Quantity | Cost |
|---|---|---|
| 1x4x16 | 4 | $72 |
| 1x4x12 | 11 | $154 |
| 8 ft Trim | 20 | $240 |
| 12 ft Trim | 1 | $18 |
| Finishing Materials | Cost |
|---|---|
| Nails | $8 |
| Filler & Caulk | $10 |
| Sand Paper | $8 |
| Paint & Primer | $120 |
Total Cost of Project $630
Step-by-Step Guide: How to Install Molding On Stairs
1. Plan The Grid Layout
Before adding any molding, I measured the entire staircase wall and marked anything that would get in the way—HVAC vent, thermostat, outlet, all of it. From there, I figured out how many rows and columns made sense for the space. The final layout really depended on the wall’s height and width, especially with the angled slope.

Once that was set, I calculated the size of each square or rectangle and adjusted as needed so the grid stayed consistent from top to bottom.

Before you start cutting any materials, sketch your layout on paper. Or use painter’s tape to create a the pattern on your wall. This mock-up will help you visualize the spacing and alignment, ensuring that your grid design looks balanced
2. Mark and Prep the Wall
I created a marking guide using a laser level to get a straight reference line while laying everything out, and instead of drawing directly on the wall, I used painter’s tape.
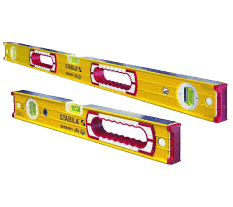
all the are the tools we used


3. Remove Existing Molding and Trim

We removed the baseboards with a pry bar and a flathead screwdriver, gently working them away from the wall to avoid damage. After that, we took off the trim below the stairs. We scored the seam with a utility knife first if it was painted or tightly nailed in place.
4. Install the Boards


We started by building a frame around the perimeter of the wall, which replaced the baseboards and existing trim. From there, we added the center rail. The vent ended up being the main obstacle and ultimately dictated the grid pattern and sizing.
Once the frame and chair rail were in place, we moved on to the vertical boards. We started with the bottom half first to make sure we liked how the layout was coming together before committing to the full wall.

Each piece was secured with our nail gun using brad nails, angled slightly at 45 degrees. Panel adhesive with pin nails would have worked too. We used a laser level to keep everything straight and perpendicular, though a standard level would work—it just takes a little more time.
5. Add Your Inside Trim


We started by cutting standard 45-degree angles since they’re easier to work with. Once we felt confident, we moved on to the trickier cuts needed for the angled sections of the wall.
We installed each piece as we cut it, though you could also cut everything first and label each piece. From there, we installed the inside staircase molding clockwise, positioning each piece with a level before securing it with pin nails angled slightly for a stronger hold.


See the FAQ section below for tips on how to figure out the angles
6. Prep For Paint


All in, this project took about 11 hours spread across three weekends. If you’re able to stay focused, you could knock it out in a single weekend, but breaking it up made it way more manageable. One weekend to install the trim, the next to fill nail holes, caulk, and sand, and the last to prime and paint—it kept the project from feeling overwhelming and made each step easier to tackle.


FAQs Section: Staircase Molding
Understand the Angles: Acute angles are angles less than 90 degrees, while obtuse angles are greater than 90 degrees but less than 180 degrees.
To cut acute angles: set your miter saw to the angle you want.
To cut obtuse angles: Divide the angle by two, then subtract the half from 90. Example 135 degrees is an obtuse angle . 135 divided by 2 is 67.5. 90 minus 67.5 is 22.5. So set your miter saw to 22 1/2.
Use a Protractor: Place the base of the protractor on one side of the angle and read the corresponding degree measurement.
Marking the Wood: After determining the angle, mark your cut line direction clearly. I have made some costly mistakes cutting the angle in the wrong direction.
Test Cut: If you have scrap wood, consider making a test cut before cutting into your final piece.
A common height for wainscoting is between 32 to 48 inches. Just remember the rule of thirds; The one-third height rule generally puts the wainscoting top rail at chair-rail height, a standard 3 feet from the floor. Two-thirds up the wall is usually done with Board and Batten. And Judges Paneling is the entire wall, usually made up of rectangles and squares.
Planning and Measuring (1–2 hours) Getting the wall measurements and figuring out the layout could only take an hour or two. But let’s be real, it took us forever to figure it out.
Cutting the Molding (2–6 hours) Cutting the molding isn’t as easy as it looks. If you’re new to the miter saw or working with angles, it’s smart to set aside some extra time.
Installing Molding (2–6 hours) Putting up the molding takes a while. You’ll need to make sure each piece is level and secure, especially if the wall isn’t straight.
Caulking and Filling Gaps (1–4 hours) Sure, caulking and filling nail holes might seem quick, but taking your time here makes a big difference for a smooth finish.
Priming and Painting (3–5 hours, including drying time) Putting on primer and paint could eat up a few hours. Just remember to let it dry between coats. And in our case it’s more like 3-5 business days because we can’t agree on a color
More Staircase Projects

Upgrade Your Stairs with InstaTrim
I was this close to calling it done. My staircase renovation was almost finished, but…

Weekend DIY: Repairing and Painting Exterior Stairs
f your exterior stairs keep peeling, chipping, or just won’t hold paint, this is exactly…

Upgrade a Staircase Rosette
Check out how I transformed my staircase with a simple weekend DIY project! Using scrap…
Latest Projects
Check Out My Latest Home Makeovers and DIY Transformations


